


G'day mate! So, you've got yourself a new Camplux hot water heater and you're itching to get those toasty outdoor showers running. Now you might be wondering: do you give it a go DIY style or call in a professional to handle the install? No worries – we're here to chat through both options in a friendly, down-to-earth way. By the end of this read, you'll feel confident about setting up your Camplux heater the right way for you. We'll especially focus on why DIY installation can be straightforward and rewarding, and when a pro might be worth a ring (like certain gas hookups or if you're just not feeling up to it). Pour yourself a cuppa, get comfy, and let's dive in!
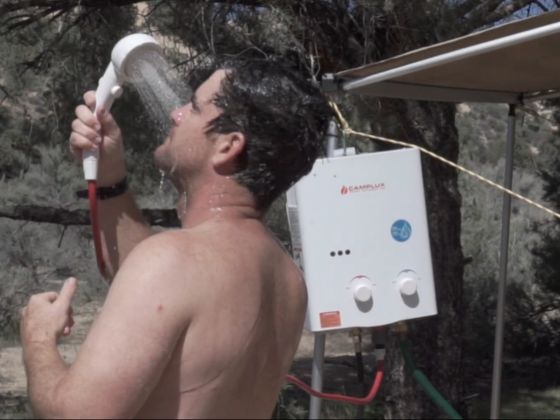
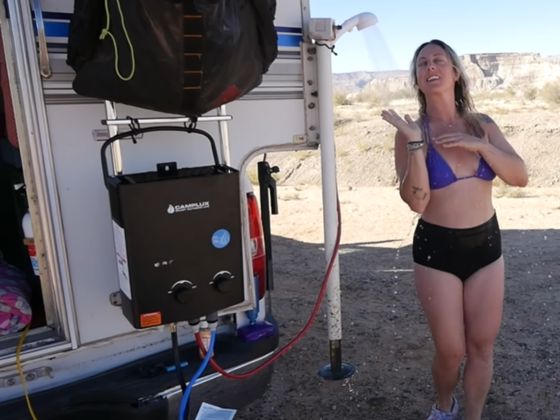
A camper sets up a Camplux portable water heater by a riverside. These heaters run on LPG and can be easily connected to a gas bottle and water source for instant hot water outdoors.
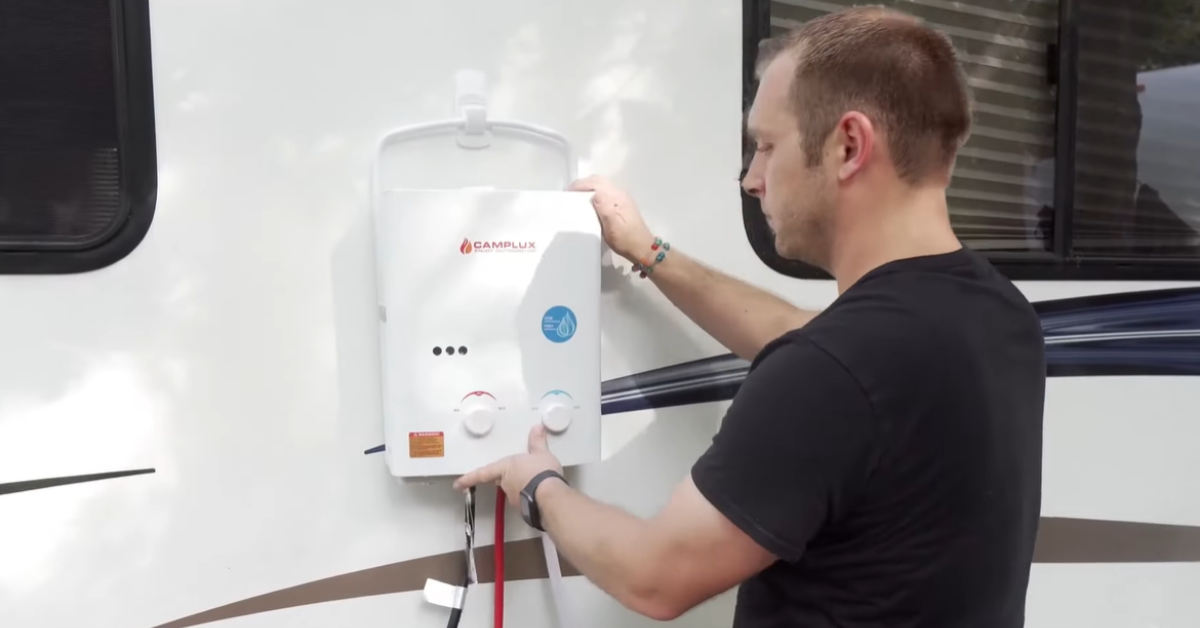
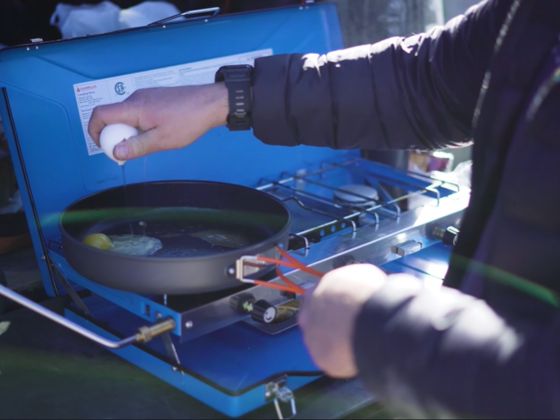
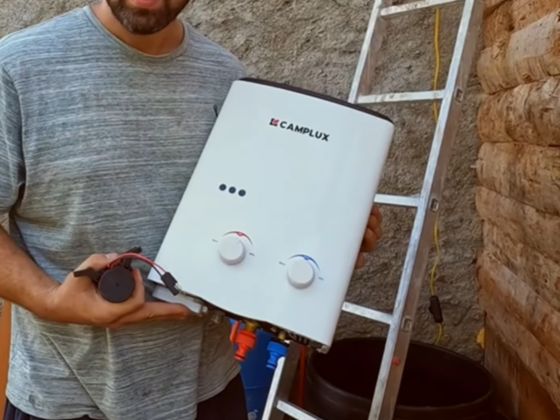
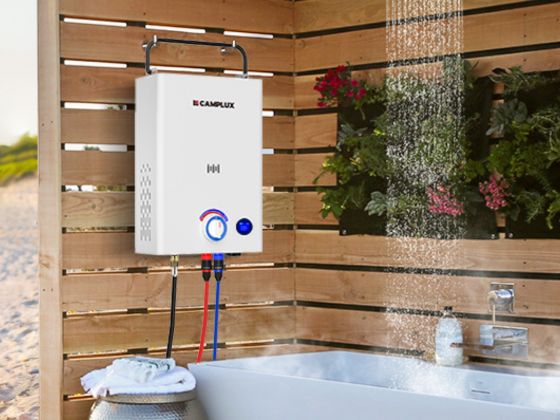
First off, Camplux outdoor water heaters are built with Aussies in mind – meaning they're tough, efficient, and pretty user-friendly. Whether you're camping in the bush, caravanning around the coast, or living off-grid on the station, Camplux has a model for you. The great news is that installing a Camplux is a breeze, even if you're not a tech guru. In fact, many Camplux units are designed for quick DIY setup with minimal tools or plumbing know-how needed. You'll typically find all the essential bits right there in the box – from an AGA-certified gas regulator and hose for your LPG bottle to the showerhead and mounting hardware. That means less running around for parts and more time enjoying a warm shower under the stars.
But let's break it down properly. We'll have a yarn about the upsides of doing it yourself, then have a look at what getting a professional entails. We'll also sprinkle in some handy tips on safety, accessories, and maintenance as we go (the kind of golden info you'd find in Camplux's support guides). By the end, whether you're a first-timer or a seasoned DIYer, you'll see that you can absolutely tackle this yourself – and know when it's okay to call in the experts. Let's get started!
DIY Installation: Why Give It a Go?
Doing the install yourself isn't just about saving a few bucks (though that's a nice perk); it's also about the freedom and confidence you gain. Camplux heaters are made to be "plug and play" for outdoor adventurers, so taking the DIY route is often a no-brainer. Here are some big reasons many Aussie Camplux owners roll up their sleeves and DIY:
Save on Costs: Installing the heater yourself means you won't be paying call-out fees or labour for a tradie. If you're comfortable with basic tools and following the instructions, you can have it all set up without shelling out for professional labour costs. That's extra money in your pocket for more camping gear or gas refills!
Flexibility & Control: Doing it on your own time means full control over the process. You can set up your heater at your own pace – whether that's a careful Saturday arvo project or a quick job right at the campsite. No need to schedule around someone else's calendar. Plus, you'll be installing it exactly how you want it configured for your setup.
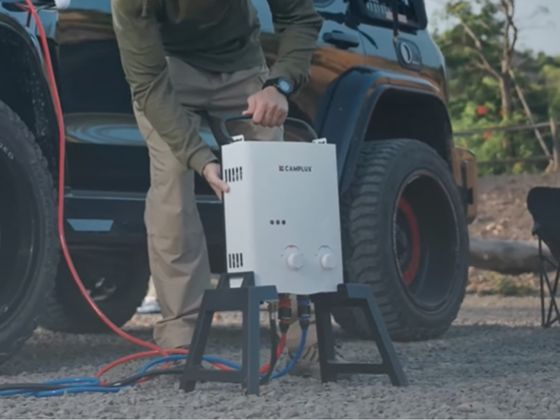
Quick, Easy Setup Camplux portable models (like the popular 6L and 10L units) are engineered for quick DIY setup. In most cases, it's just a few connections – attach the water hoses, hook up the gas bottle, pop in batteries if needed – and you're good to go. Many users report getting their heater up and running in under an hour. The included quick-connect fittings and clear instructions make it straightforward to follow a step-by-step guide. It's basically designed so that even if you've never installed a water heater before, you can succeed on your first go.
Satisfaction of Doing It Yourself: There's that undeniable sense of accomplishment when you finish a DIY project. Installing your Camplux heater on your own gives you bragging rights and the confidence of knowing exactly how your system is put together. This means when it's time for routine maintenance or if a hiccup happens, you'll already be familiar with every hose and fitting. In short, you'll know your gear, which makes you a more self-reliant camper.
Now, let's be real: even the best DIY project comes with a couple of considerations to keep in mind. Installing a water heater involves gas and water connections, so you do want to approach it with due care. Here are a few tips and cautions for a smooth DIY install:
Read the Manual & Follow Guidelines: It sounds obvious, but start by giving the Camplux manual a good read. The manuals are written in plain English (no overly technical gibberish) and include useful diagrams and safety info. Keep it handy during the install. Camplux also has online step-by-step guides and blogs that walk you through the process, which can be a great supplement to the manual. Don't skip the safety warnings – they're there to keep you and your family safe.
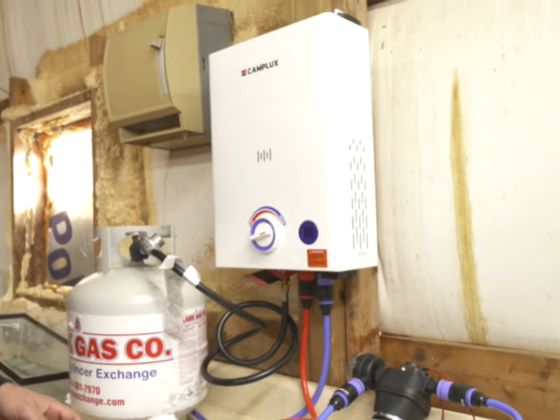
Use the Right Accessories: Make sure you have all the bits needed for a safe setup. The good news is Camplux heaters come with most of it. You'll typically get the gas regulator/hose, water hoses, and a shower head in the kit. Double-check you've got a proper LPG cylinder and regulator (the one in the box is already suited for Aussie BBQ-style gas bottles), and any hoses or fittings are correctly rated. If you need extras – say an additional water pump for low pressure situations or a longer hose – using the right gear is key to a leak-free installation. Don't jury-rig with random hardware store bits that aren't rated for propane or outdoor use. It's worth grabbing the proper Camplux accessories (like extension hoses or a filter) to make sure everything stays safe and sound.
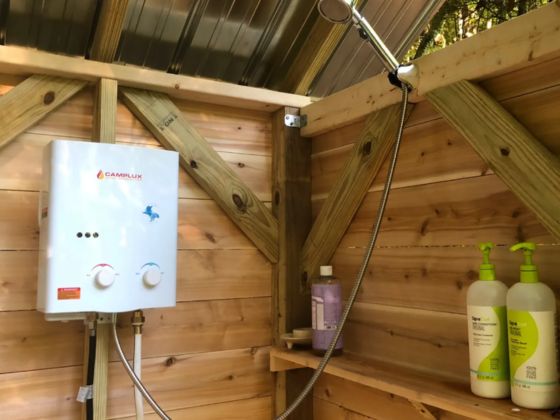
Take Safety Precautions: DIY doesn't mean cutting corners on safety. Always set up your heater outdoors in a well-ventilated spot – these units are for outdoor use only, never indoors or in enclosed spaces. Pick a spot a safe distance from tents, awnings, or any combustible materials. For example, put the heater a few metres away from your campsite living area so there's plenty of fresh air around the unit. Use the mounting brackets or hang it up at about chest height if possible (Camplux heaters often have handles or mounting points), keeping it off the ground and upright. This helps keep any gas that might leak low and away from the burner (propane is heavier than air and sinks, so an elevated heater is an extra safety step). And of course, never light up the heater near flammable liquids or in the middle of your gazebo – common sense stuff, really.
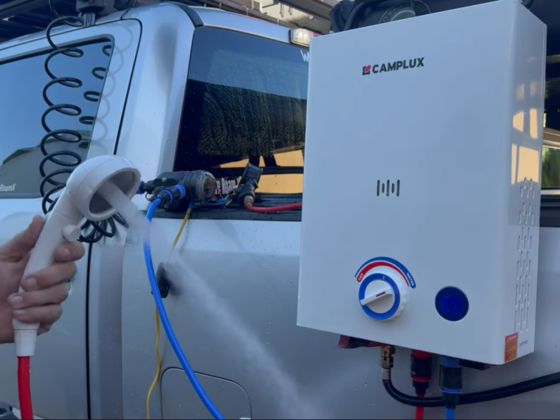
Do a Leak Test: This is an absolute must whenever you hook up gas. It's simple: after connecting the regulator to your gas bottle and the hose to the heater, spray or brush soapy water on the connections, then crack open the gas valve briefly. If you see bubbles forming, you've got a leak – shut off the gas and tighten the connections. No bubbles? Beauty, you're all set (don't forget to turn the gas off again until you're ready to ignite). This quick soapy water test is exactly what the pros do and takes only a minute or two, but it gives you peace of mind that your DIY job is safe. Always keep the gas bottle upright and in a stable spot while you work and use the heater.
Have Basic Tools Handy: You don't need much – usually a screwdriver (for mounting screws) and maybe a spanner for the gas fitting if it doesn't have a hand wheel. Camplux's hoses often have tool-free connectors or easy hand-tighten nuts. Avoid using Teflon tape on gas fittings unless instructions explicitly say so; Camplux specifically advises not to use plumber's tape on the gas connections because the supplied fittings and rubber seals do the job. If you're unsure about any step, pause and check the manual or Camplux support resources. There's no rush – a careful install is better than a rushed one.
By following these pointers, most folks find that DIY installation is not only doable but actually pretty straightforward. In fact, many first-timers end up saying, "That's it? I thought it would be harder!" And remember, if you ever get stuck, Camplux's customer support is just a call or click away, and there are plenty of fellow users (and Camplux's own how-to articles) to guide you. You've got this!
One extra perk of going DIY: you'll become the de facto Camplux expert among your mates. Once you've installed it and know the ins and outs, you'll also be ready to handle basic upkeep. Simple routine maintenance like cleaning the burner and checking the water inlet filter is easy when you understand your heater's setup. And because you did the install, you'll know where to look if something isn't quite right. Common issues – say the heater not igniting – are often due to minor things like low batteries or low water pressure, which you can fix yourself in a jiffy. In short, DIY installation sets you up to be self-sufficient. It's a good feeling when you can not only install but also troubleshoot your gear without immediately calling for help.
Of course, despite all the advantages, not everyone will be comfortable with DIY, and that's perfectly fine. Let's talk about when bringing in a professional might make sense.
Professional Installation: When Should You Call an Expert?
While Camplux heaters are designed with the do-it-yourselfer in mind, there are scenarios where you might prefer (or need) a qualified professional to handle the install. Here in Australia, for example, certain types of gas installations legally require a licensed gas fitter – especially if you're connecting the unit to a fixed gas line or integrating it into a permanent home/plumbing system. For the portable LPG bottle setups most campers use, DIY is usually fine (that's akin to hooking up a BBQ, which people do themselves). But if you're unsure about any gas connections, or you've got a larger hot water system model for a home or cabin, a professional's expertise can be very reassuring.
So, what are the perks of opting for a pro? Let's break them down:
Expert Knowledge & Experience: A licensed installer will have the know-how from doing many of these installs before. They can handle all aspects – gas, water, mounting – efficiently and safely. If you've picked up a higher-capacity unit or a more complex system, a pro will make sure everything is set up correctly and safely according to specs. They'll also tune things like gas pressure or check for proper water flow as part of the job. You're essentially paying for peace of mind that it's done right.
Compliance with Regulations: Professionals are up-to-date with Australian standards and local regulations. They'll ensure your Camplux installation meets all AU gas safety codes and any relevant regulations (which can vary by state). This is important for safety and also if you ever plan to have the setup inspected or certified (some caravan parks or home insurance policies might require proof of proper installation for gas appliances). Using a certified gas fitter means no worries about paperwork – they can provide compliance certificates if needed, and you won't risk any fines or insurance issues down the track.
Speed and Convenience: What might take a newbie a couple of hours could take a pro much less. They come with the right tools and can usually get your heater mounted, connected, and tested in short order. If you're short on time or just don't want the hassle, a professional installation saves you the effort. You can literally sit back with a cold drink while someone else does the work. It's the hassle-free route, for sure.
After-Install Support: Many pros will stand by their work. That means if something isn't working quite right after the install, you often have a warranty on the installation labor where they'll come back and fix it. Also, having a pro do it might make it easier to claim warranty service on the unit itself if anything ever went wrong – not that we expect issues with a quality unit like Camplux, but it's a small comfort. Essentially, you're buying some extra peace of mind.
Now for the downsides of hiring an installer – the main one is cost. Professional installation isn't cheap. Depending on your location and the complexity, the service can add a significant chunk to your overall spend. Also, you might need to coordinate schedules, which isn't always instant (and waiting for an appointment can be a drag when you're eager to get your hot water going). In remote areas, finding a qualified installer who's familiar with portable camping heaters might be a challenge, meaning you could pay extra travel fees or have to wait longer.
Another thing: by not doing it yourself, you don't get that hands-on familiarity with your gear. If something minor needs adjusting later, you might feel less confident tinkering since you didn't set it up. However, these are small trade-offs if you truly are not comfortable with DIY or if regulations mandate a pro for your particular setup.
So, DIY or Pro – Which Is Right for You?
At the end of the day, the choice comes down to your comfort level and the specifics of your installation. Here are a few pointers to help you decide the best path for your Camplux heater:
Go DIY if you have a portable model and basic handy skills. For instance, if you're setting up a smaller unit like the Camplux 5L or 10L portable water heater for camping, DIY is usually the way to go. These units are designed for everyday folks to install themselves. As long as you follow the safety guidelines (outdoor use, proper connection, leak tests, etc.), you'll be fine. DIY is especially great if you're out in the field – say you're already at camp and need to set up on-site – it gives you the freedom to get things running anywhere, anytime. And let's face it, there's a bit of pride in being able to say "I installed it myself" when you're showing off your camp shower to mates.
Call a Pro if you're dealing with a larger or permanent installation, or you just feel unsure about doing it solo. If you have a big tankless unit mounted at home, or you need to plumb the heater into an RV or property water system with hard piping, a licensed installer is highly recommended (and may be legally required). Also, if the whole idea of hooking up gas makes you nervous – there's no shame in getting an expert. Your safety and peace of mind are paramount. It's worth the cost if it means you'll sleep better at night knowing the job was done by a certified professional. Some folks choose a pro for the initial install, then handle smaller adjustments or maintenance themselves afterward – that's a valid approach too.
Remember, whichever route you go, the goal is to enjoy reliable hot water on your adventures. Camplux heaters, once set up, are low-maintenance and built to last, so the installation is a one-time effort for years of comfort.
Conclusion: You've Got This, Mate!
Whether you decide to DIY your Camplux heater install or hire a pro, you're on your way to making your outdoor living a whole lot more comfortable. There's nothing quite like a warm shower after a long day of hiking, surfing, or working on the farm – and Camplux delivers that luxury wherever you are.
If you're a first-timer, we hope this chat reassured you that DIY installation is absolutely doable. With a bit of care and by following the Camplux guidelines, you can have your heater safely up and running in no time. The process is straightforward, and you've got plenty of resources at your fingertips – from the instruction manual to online step-by-step guides – to guide you every step of the way. Plus, the Camplux community and support team are always there if you hit a snag. It's like having a mate who's done it before giving you pointers along the way.
On the other hand, if you feel better bringing in an expert for that extra confidence (or you have a setup that calls for it), that's alright too. The ultimate aim is safe, efficient, and hassle-free hot water. There's no one-size-fits-all answer – it's about what's best for your situation. At the end of the day, enjoying a hot shower in the Aussie outdoors is what it's all about, and both paths lead there.
Thanks for sticking with us through this guide. We're stoked for you to start enjoying your Camplux heater to the fullest. If you need any more info or want to explore the full range of Camplux products and support resources, be sure to check out Camplux Australia. We've got heaps of other tips on accessories, maintenance, gas safety, and more to help you make the most of your gear. Now, go on and enjoy those warm showers under the open sky – you've earned it. Cheers, and happy camping!