


Installing a hot water system while camping used to be a job for the pros – but with Camplux portable water heaters, you can do it yourself in minutes. In this guide, we'll show you how to set up a Camplux outdoor water heater step by step. Whether you're deep in the Aussie bush or at a caravan park by the coast, a hot shower is within easy reach. We'll focus on the Camplux Nano 3 Pro and Camplux F10 models, two user-friendly options perfect for camping and caravan use. By the end, you'll feel confident about hooking up your heater for instant hot water on your next adventure, no plumber required!
Why Choose the Camplux Nano 3 Pro and F10 for Camping?
Camplux makes a range of portable LPG gas hot water systems built for outdoor living. The Nano 3 Pro and F10 are standout choices for Australian campers and caravanners because of their quick DIY setup and reliable performance. Here's why these two models are recommended:
-
Portable and Compact: The Nano 3 Pro is ultra-lightweight (about 6 kg) and designed to be travel-ready. It even works with small 1 lb propane canisters, so you don't have to lug around a big gas bottle if you're just off for a weekend . The F10 is a bit larger in capacity (10 L per minute flow) but still compact for a 10L unit. It comes with a folding handle for easy carrying and hanging, making it ideal for campsites and caravans where you might want a higher flow for multiple uses.
-
Quick DIY Setup: Both models are engineered for easy installation without any special tools or plumbing knowledge. Hoses and connectors use a quick-connect design, so you can clip the water hose and shower head on in one step. The Nano 3 Pro even includes the 12V pump in the kit, already fitted with the right connectors – just drop it in a water source and you're almost ready to go. These heaters ignite automatically on water flow, so getting hot water is as simple as turning on the tap or pump. No complicated priming or pilot lights to deal with.
-
Built for Off-Grid Use: When camping in remote areas, power sources can be limited. The Nano 3 Pro has a built-in rechargeable battery that gives about 90 minutes of continuous hot water, and it can charge while in use via a car socket or power bank – meaning you'll never run out of power for your shower. The F10 uses two D-cell batteries to ignite, so it also operates fully off-grid without mains power. Both heaters run on standard LPG (the same gas your BBQ uses), which is readily available across Australia. For extended off-grid setups, you can even integrate these with a solar power system (for example, to recharge the Nano's battery) – see our off-grid solar integration guide for tips on that.
-
Safe and Reliable: Safety is crucial when using gas appliances outdoors. Camplux has built-in safeguards like flame failure shut-off and overheating protection on these models. The Nano 3 Pro boasts a 5-layer safety system (including tip-over auto shut-off and a 50 °C max temperature cap to prevent scalds, great for families with kids). The F10 likewise has safety features such as automatic flame failure protection and a water pressure sensor. Always remember to follow basic precautions – use the heater only in well-ventilated outdoor areas and test your gas connections. (If you're new to gas appliances, check out our Gas Safety Guide for portable heaters to learn how to perform a quick leak test and other safety best practices.)
-
Caravan-Friendly: For caravan enthusiasts, these units are a fantastic upgrade to your setup. The F10's higher flow means you could even supply a sink and an outdoor shower simultaneously, mimicking the comforts of home. The Nano 3 Pro, on the other hand, is so compact you can easily stow it in your caravan storage and deploy it only when needed – perfect for those who want a hot shower outside under the stars without permanent plumbing. Both units come with attachments to hang the heater (for example, on the side of a caravan or a tree branch) and long shower hoses, giving you flexibility in how you set up your wash area. (For more ideas on integrating a portable unit with your camper, see our caravan-specific usage guide which covers mounting options and plumbing into a camper's water tank.)
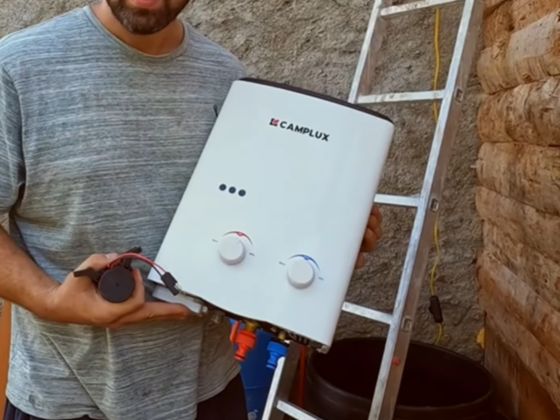
 Camplux Nano 3 Pro is a battery-powered 3 L/min portable water heater that comes as an all-in-one kit. It includes a submersible pump, hose attachments, and even works with small propane canisters – all geared towards quick setup for campers. Just charge it up, connect the gas and water, and you're ready to enjoy a hot bush shower within minutes of arriving at camp.

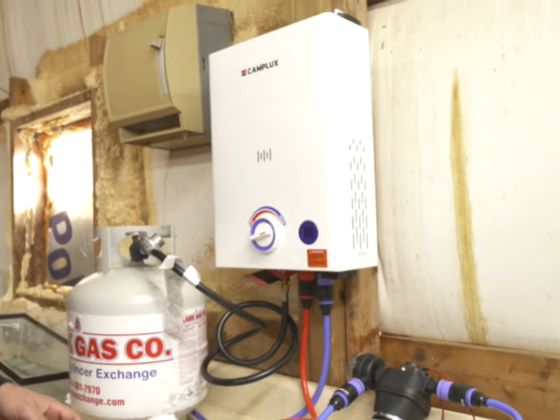
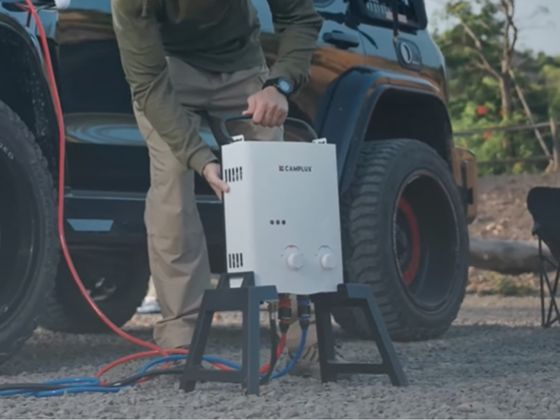
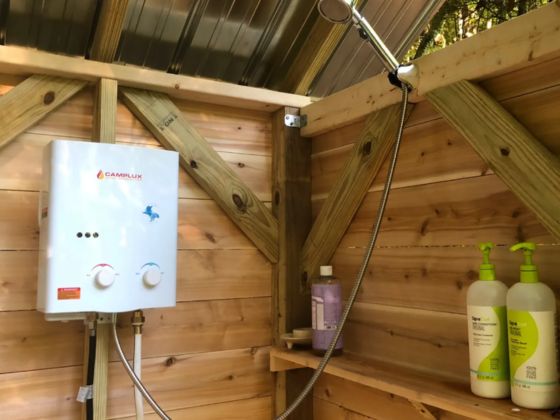
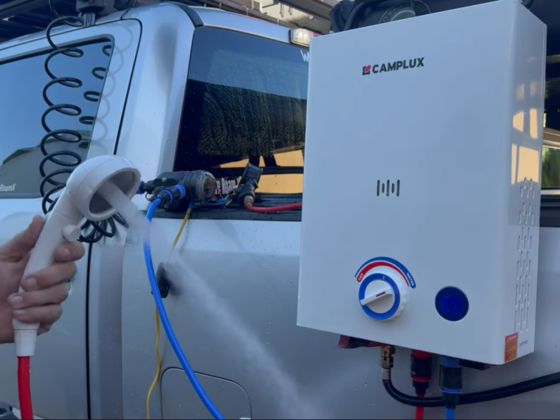
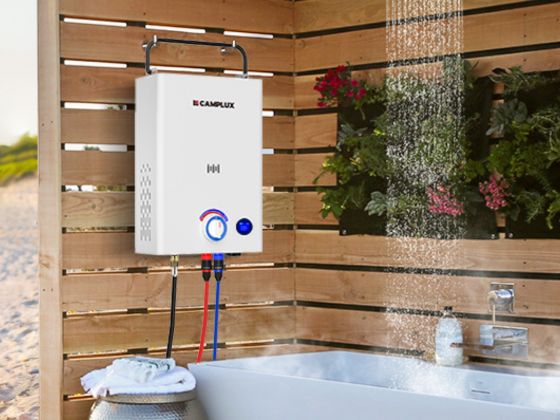
Camplux F10 is a 10 L/min high-flow portable water heater that's great for caravans and family camping. It hooks up to a standard LPG gas bottle (like the ones used for BBQs) and a water source to provide a stronger flow of hot water. Despite its higher capacity, the F10 remains easy to install and carry – note the sturdy folding handle on top, which makes it simple to hang up at your campsite or on the side of your caravan for instant hot water on tap.
(Curious about how these models perform in real-world conditions? Check out our in-depth Camplux Nano 3 Pro review and Camplux F10 review for a closer look at their features and user experiences.)
What You Need for a Quick Installation
One of the great things about Camplux heaters is that they don't require complex tools or expertise to set up. Before you begin, make sure you have the following on hand:
-
Your Camplux Water Heater: In this case, the Nano 3 Pro or F10 unit, along with all the accessories that came in the box. The package typically includes the water heater itself, a gas regulator hose, a shower head with hose, and mounting hardware or hanging straps. The Nano 3 Pro kit will also have a 12V pump and power cords, while the F10 includes a few screws/brackets for mounting if needed.
-
Propane Gas Source: An LPG gas cylinder to fuel the heater. For camping, a common 4 kg or 9 kg BBQ gas bottle is perfect. (The Nano 3 Pro can also use those small 450 g camping propane bottles for short trips, but for extended use a standard gas bottle is more practical.) Ensure your gas bottle is filled and in good condition. Safety tip: Always keep the gas cylinder upright and in a ventilated area when in use. (We cover handling of gas bottles and regulators in our Gas Safety Guide, which is a recommended read if you're new to using LPG appliances.)
-
Water Source: You'll need a source of water to heat. This could be as simple as a jerry can or bucket of water at a remote bush camp, a collapsible water bladder, or a tap connection at a powered campsite or caravan park. The Camplux Nano 3 Pro comes with a submersible pump that you can drop into a container of water. The F10 can be fed by a garden hose (if you have mains or tap water available) or by an external pump. Make sure the water is relatively clean (free of debris) to avoid clogging the heater – using a simple in-line water filter is a good idea if the water is from a creek or dam. Tip: For ideas on useful add-ons like water filters, shower tents, or mounting poles, see our camping accessory recommendations guide.
-
Power Source: This mainly applies to the Nano 3 Pro's pump and internal battery. Ensure the Nano's battery is charged before your trip, or have a 12V outlet (like your vehicle's cigarette lighter or a portable power pack) available for charging or powering the pump. For the F10, have two fresh D-cell batteries on hand to install in the ignition compartment – these power the spark that lights the burner. No other electrical hookup is required for the F10.
-
Basic Tools: In most cases, you won't need much. The gas regulator that comes with Camplux heaters usually has a handwheel or nut that can be tightened by hand onto the gas bottle. If it's a nut, you might use a spanner (wrench) for a final snug turn – but do not over-tighten. A crescent wrench or pliers can help if needed. Also, have some soapy water ready (just a bit of dish soap in water) to spray or dab on gas connections to test for leaks once connected. This simple leak test will bubble if any gas is escaping, indicating you need to tighten the connection. It's a quick safety check we highly recommend before firing up the heater (and again, see our Gas Safety Guide for a step-by-step on leak testing).
With these items gathered, you're all set to install your Camplux heater. Now let's get into the actual installation process, which is surprisingly straightforward.
Step-by-Step Installation Guide
Setting up your Camplux Nano 3 Pro or F10 is a breeze. We'll outline the steps below. The process is quite similar for both models, with just a few small differences noted along the way. In general, you'll be connecting the water, connecting the gas, powering on, and you're ready to enjoy hot water. Let's get started!
-
Choose a Safe Location: Pick an outdoor spot for the water heater that's level, stable, and well-ventilated. This could be a spot on the ground a few metres away from your tent or caravan, or you might hang the unit using its handle on a hook or tree (many campers hang the heater at about waist to shoulder height for easy access). Make sure there's nothing directly above the heater – it does produce hot exhaust gases that rise, so keep awnings or tarps well clear of the top. Avoid windy spots if you can, as a strong breeze could blow out the burner flame. Never operate the heater inside an enclosed space like a tent or inside your caravan; it's outdoor-use only for safety. If you need privacy for showering, set up a shower tent nearby and run the shower hose inside, but keep the heater itself outside. (For more safety pointers on placement and ventilation, refer to our Gas Safety Guide.)
-
Secure the Heater and Attach Shower Hose: Once you've got the location, secure your heater in place. For the Nano 3 Pro, simply set it down on its sturdy base or use the dual handles to hang it. The F10 can hang by its fold-out handle or be mounted temporarily using the included bracket/screws (for example, some caravanners attach the bracket to the side of the van so they can easily hook the unit on/off at camp). Next, take the shower head and hose assembly from the kit and connect it to the heater's water outlet. This usually involves screwing on a fitting or clicking in a quick-connect. The Camplux hoses are fitted with rubber O-rings, so they should seal by hand-tightening – no plumber's tape needed. Ensure the shower hose is connected firmly and route it to your shower area (lay it over the tent or branch as needed). Attach the shower head to its little holder or hook so it doesn't lie on the ground. This part is basically plug-and-play.
-
Connect the Water Inlet: Now connect your water source to the heater's inlet. If you have pressurized water available (like a tap at a powered site), you can simply attach a garden hose to the inlet (Camplux inlets typically have a standard garden hose connector). Don't turn on the water yet. If you're using the 12V pump (for Nano 3 Pro or an external pump for F10), connect the pump's hose to the water inlet. The Nano's red-and-white quick connector will snap into the inlet easily (American Express) – it's foolproof. Place the pump into your water container (bucket, jerry can, etc.), making sure the pump is fully submerged. It's a good idea to have the container refilled or topped up enough for your entire shower before you start, to avoid the pump running dry. (The Nano 3 Pro has a low-water sensor to cut off if water runs out (CAMPLUX Nano 3 Pro – Lightest Outdoor Gas Shower with 5X Safety & Rapid Charging - Bunnings Australia), but it's best not to trigger it unless necessary.) Double-check that the inlet connections are secure. A loose inlet hose could pop off and spray water everywhere once you turn the pump on!
-
Connect the Gas Supply: This step is straightforward. Ensure the gas bottle is closed (valve off), then take the Camplux gas regulator hose and attach it to your LPG cylinder. For most Aussie gas bottles, this will either be a POL fitting (internal screw) or a click-on type – Camplux usually provides the POL type that screws into the bottle valve. Insert the regulator end into the bottle's outlet and tighten it (by hand or with a spanner if needed) snugly. Attach the other end of the gas hose to the heater's gas inlet (usually a brass threaded stub on the bottom of the unit). This end typically screws on by hand as well. Make sure the gas connection at the heater is tight. Now, perform a quick leak test: turn on the gas bottle valve just a quarter turn to pressurize the line, and spray or dab soapy water on the connections (both at the bottle and where it attaches to the heater). If you see bubbles forming, tighten the connections a bit more and test again. No bubbles? Good to go – turn the gas back off for now and proceed. Taking a few moments for this safety check is well worth it for peace of mind. (If you're unsure about any of the gas hookup steps, our Gas Safety Guide has detailed instructions and images to guide you through connecting regulators and checking for leaks safely.)
-
Power On and Ignite: Now for the exciting part – firing it up! For the Camplux Nano 3 Pro, press the power button on the unit to turn on its internal electronics (and make sure its battery is charged or it's connected to 12V power). You should see its display light up indicating it's ready. For the Camplux F10, insert the two D-cell batteries into the battery compartment (usually accessed via a little panel on the bottom or side) if you haven't already done so. The batteries will power the ignition spark. There's no "power button" on the F10 – it's mechanically triggered by water flow.
Now, turn on the water flow. If you're using a pump (Nano 3 Pro scenario or an external pump), switch the pump on. The Nano 3 Pro's pump might have a switch inline or you might control it via the unit's button depending on the model – consult the manual, but generally once the Nano unit is on, you just turn on the pump power and it will start pushing water. If you're on a hose/tap for the F10, just open the tap slowly. Water will begin to flow through the heater and out the shower head. Within a second or two of water flow, the heater's automatic ignition should click and ignite the gas. You might hear a "whoosh" or soft foomph sound as the burner lights up. Congrats – you've got hot water!
At this point, if you look at the heater, the F10's little flame indicator or gas burner sound will let you know it's on. The Nano 3 Pro likely has an LED display that shows water temperature and battery level. If the burner doesn't ignite on the first try: turn off the water flow (pump or tap), double-check that the gas bottle is open, and that the batteries/power are on. Then try again – sometimes the first ignition can take an extra moment to purge air from the gas line. Most often, though, it fires up immediately if all connections are correct. In case of any hiccup, refer to our Troubleshooting FAQ (internal link) for tips – usually it's something simple like a battery orientation or low gas pressure that's easy to fix.
-
Adjust the Temperature and Flow: Both the Nano 3 Pro and F10 allow you to regulate the water temperature to your comfort. The F10 has dials (knobs) – typically one for gas flow and one for water flow. You can increase the gas flow (making the flame hotter) or increase water flow (making water move faster through the heater) to adjust the output temperature. A common method is: if the water is too hot, you can turn up the water flow or turn down the gas; if it's not hot enough, do the opposite. The F10's 2-in-1 knobs are labeled, and you'll find a sweet spot quickly. The Nano 3 Pro often maintains about a 50 °C max output by design, but some models might have a temperature setting or at least an on/off for the burner. With its fixed pump flow, the Nano is pretty much set-and-forget – you'll get a comfortable warm shower without much fiddling. Use the shower head's flow trigger (if it has one) to pause the water while soaping up (the Nano's safety will stop the burner after 2 minutes of no flow to save gas, and it will reignite when you resume water flow). The F10, if the shower head has a flow stop button, will also extinguish and reignite automatically with water flow. Always test the water temperature with your hand before stepping under the shower, and adjust to a safe, pleasant warmth. It should only take a few seconds for any adjustment to be felt at the shower head.
-
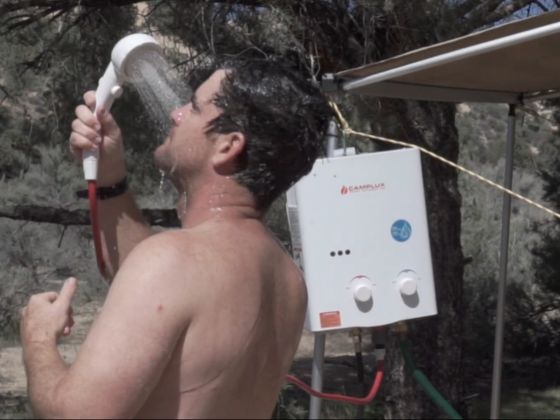
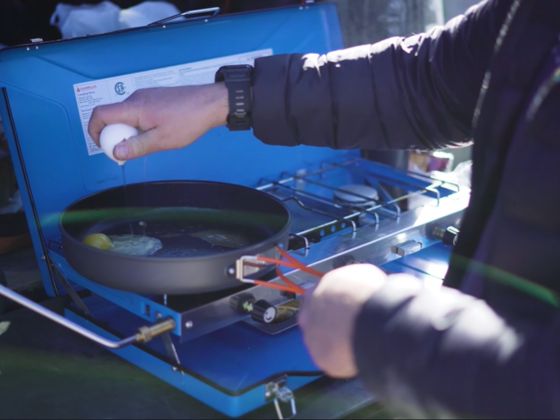
Enjoy Your Hot Shower: That's it – you've installed and started your Camplux heater all on your own! Now enjoy the luxury of a hot shower in the great outdoors. Lather up, relax those trail-weary muscles, and relish the moment. You can also use the hot water stream for washing dishes, cleaning gear, or any other camp chore that's easier with warm water. Because these heaters deliver instant hot water, you're not limited to a fixed amount – as long as you have gas and water supply, you can keep getting hot water on demand. Just be mindful of your water usage in remote areas so you don't run dry.
-
Shut Down and Pack Up (When Done): After you've finished using the heater, turn off the gas supply first by closing the gas bottle valve. The burner will flame out as the remaining gas in the line is used up. Then turn off the water pump or tap. Open the shower head to release any pressure and let the water drain out. If the unit has a drain plug (many portables like the F10 do, at the bottom), you can open it to drain residual water – this is especially important if you're in freezing conditions, to prevent water from freezing inside and damaging the unit. (See our winter storage and maintenance guide for how to properly drain and protect your heater in cold weather.) Finally, disconnect the hoses and pack everything away once it's cool. The Nano 3 Pro and F10 both cool down quickly after use (a minute or two). Store the unit in a dry place until next time. Many campers keep the heater connected to the shower tent or pack it in a plastic crate for convenience.
That's the whole installation process from start to finish. You can see why we say it's quick and easy – after doing it once or twice, you'll be able to set up or pack up your hot water system in as little as 5 minutes at camp. It's truly a DIY-friendly solution, even if you're not particularly "handy."
Tips for Camping and Caravan Use
Now that you know how to install your Camplux water heater, here are some extra tips to get the best out of it in various camping and caravanning scenarios:
-
Camping Shower Setup: If you're setting up a dedicated shower area, consider using a popup shower tent for privacy. Run the Camplux's shower hose into the tent – it's long enough to give you room to move around. Keep the heater unit and gas bottle outside the tent. Also, stand on a wooden slat mat or old towel to keep your feet clean from mud. An accessory shower stand or hook can be handy to hold the shower head at height; Camplux kits often include a little hanging bracket for the shower head, which you can attach inside a tent or on a pole. (Our accessory recommendations article highlights some useful add-ons like shower tents and stands that pair well with portable heaters.)
-
Using with a Caravan or Camper: If you have a caravan, camper trailer, or van, you can integrate the portable heater into your setup. For instance, you might plumb a quick-connect fitting to your caravan's water tank so that you can easily plug the Camplux water inlet into it when you set up camp. Likewise, a quick-connect gas fitting on the drawbar can let you hook up the heater to your main gas bottle without unscrewing the regulator each time. This makes the setup even faster. Always detach and cap the connections when you pack up to drive. Remember, only operate the unit outside – some people build a vented enclosure on the side of their caravan or mount the heater on an exterior wall so they just flip it down when needed (if you do this, follow all ventilation guidelines and possibly have a professional check it). Our caravan-specific usage guide delves into more ideas on semi-permanent mounting and plumbing while keeping things safe and compliant.
-
Off-Grid Water Heating: For extended off-grid trips, plan your energy and water use. Carry sufficient LPG – a 9 kg gas bottle can provide many days of hot showers (exact usage will depend, but these heaters are quite efficient). Water might be your limiting factor; consider a water bladder or jerry can system where you can refill from streams or rainwater if available. The Camplux Nano 3 Pro's pump can draw from any water source, but if the source is silty, use a cloth or pre-filter on the intake to avoid clogging. If you have a solar setup, you can easily keep the Nano's battery charged. The pump can also run directly off a 12V outlet in your 4WD or camper. Check our off-grid solar integration guide for tips on powering 12V accessories – a small solar panel and battery setup can keep your water heater and other gadgets running without starting a generator.
-
Winter Use and Maintenance: Planning a winter camping trip or living on the road through chilly seasons? The Camplux heaters can be used in cold weather, but you must prevent them from freezing when they're off. After each use in near-freezing conditions, drain the heater completely (open that drain plug and shake out water). Store the unit somewhere it won't freeze, if possible. Before using in cold mornings, double-check that the water inside isn't frozen. Never force it on if you suspect freezing – warm it up gradually first. Additionally, in cold weather the propane gas pressure can drop, so ensure your gas bottle isn't almost empty (propane needs some pressure to vaporize). For long-term maintenance, regularly inspect the burner for any debris (spider webs are a common culprit in gas appliances). Also check the hoses for cracks or wear, especially the gas hose, and replace if needed every couple of years. See our winter storage and maintenance guide for a full checklist on how to winterize your portable water heater and keep it in top shape.
-
Efficiency Tips: To get the most hot water while conserving resources, consider taking "Navy showers" – wet down, shut off water, soap up, then rinse off. The instant on/off nature of the Camplux (with the shower head trigger or pump switch) makes this easy and saves both water and gas. The heaters are quite efficient, heating only what you use. If you're curious about fuel usage, our energy efficiency comparison article looks at how propane water heaters stack up against other hot water methods (you'll find that, per litre of hot water, these Camplux units are extremely economical compared to boiling a kettle multiple times, for example).
-
Troubleshooting on the Go: Finally, if something isn't working as expected, don't panic. Common issues might be: the water isn't getting hot (check gas supply and that your water flow isn't set too high for the F10), the unit won't ignite (check batteries/power and that the water pressure is sufficient to trigger the flow sensor), or you see a splash of cold water intermittently (that can happen if the flow rate changes or the gas is low). Our troubleshooting and FAQs guide covers these scenarios and more, so give it a read if you want to be prepared. Generally, these units are robust and simple, so there's not much that can go wrong in normal operation. A little preventive maintenance and understanding of how they work will go a long way.
With these tips in mind, you'll be a hot-water hero at any campsite! There's nothing like ending a long day of hiking or driving with a warm shower, and now you have the know-how to set it up easily.
Ready for Your Next Aussie Adventure?
Installing a Camplux outdoor water heater is truly that easy – and once you've tried camping with hot water on demand, you'll wonder how you ever went without it. Now that you're comfortable with the basics of setup, you can explore more advanced tips and ideas to enhance your outdoor hot water experience:
- A Complete Checklist for Setting Up Your Camplux Heaters
- How to Properly Ventilate Your Outdoor Water Heaters
-
Essential Safety Checks Before Using Your Camplux Heaters
- FAQs: Everything You Need to Know About Camplux Heaters
- Top 5 Uses for Camplux Portable Water Heaters in the AU
- Enhancing Your Camping Experience with Camplux Heaters
-
Upgrading Your Outdoor Shower Setup with Camplux Add-Ons
Check out our other guides and articles for advanced setup tricks, cool accessory add-ons to customize your system, and important safety checks to do before each trip. We also have inspiring stories and usage ideas from fellow campers – from bush bath setups to off-grid glamping hacks – to spark your imagination for using your Camplux heater on your next Aussie adventure.
Before you head out, be sure to browse our related guides like the Gas Safety Guide, Caravan Hot Water Setup tips, and the Camplux Nano 3 Pro and F10 product reviews for deeper insight. With a little preparation and the right knowledge, you'll be fully equipped to enjoy luxury camping wherever you roam in Australia, all powered by your handy Camplux heater. So pack your gear, grab that gas bottle, and get ready to soak in a steamy hot shower under the open sky – your campsite just got a whole lot more comfortable! Happy camping, and stay warm out there!