


If you live in Australia, your hot-water gear has to survive a lot: salty coastal air, hard bore water, red dust, wild temperature swings, and long sunny days that end with heavy dew. That mix is brilliant for camping—but tough on metal. The good news? With a few smart choices and a simple maintenance rhythm, you can keep an LPG (bottle-gas) water heater running sweet for years without it turning orange, chalky, or flaky.
Below is a practical, Australia-specific guide you can follow without special tools or trade-school knowledge. Keep it handy, and share it with the mate who "will get around to it".
Rust vs. Corrosion (and why it matters)
Rust is the reddish-brown iron oxide you see on plain steel when oxygen and moisture team up. Corrosion is broader—it includes pitting, crevice attack, and galvanic corrosion that happen to different metals (stainless, copper, brass, aluminium, zinc-coated steel) under different conditions. Why should you care?
-
Different causes, different cures. Rust on painted steel might need a coating fix. Pitting on stainless often points to chlorides (salt). Green crust on brass suggests water chemistry or galvanic action around the joint.
-
Early action saves money. If you recognise the type, you can stop it before it eats holes in a panel, a heat-exchanger fin, or a threaded fitting.
The Australian environment: what you're up against
-
Salt spray and coastal breeze. Anything near the ocean is bathed in chlorides, which are tough on stainless and coatings. Units mounted on beach shacks, vans parked bayside, or gear stored in a boat shed need extra care.
-
Hard and mineral-rich water. Many regional and outback areas have hard water. Scale builds inside the heater, trapping moisture and creating hot spots that speed corrosion.
-
Condensation and dew. Big day-night temperature swings mean cold metal surfaces wake up wet. Water that sits in seams, screw recesses, and under brackets starts trouble.
-
Dust and grit. Inland dust can hold salts and minerals; combine that with dew and you've got a damp, slightly salty cake sticking to metal.
-
UV and rain squalls. Paint and plastics chalk, crack, or pinhole over time; once the coating fails, steel underneath can rust quickly.
Think of these as "corrosion multipliers". Your job is to remove them, block them, or give water a way out before they linger.
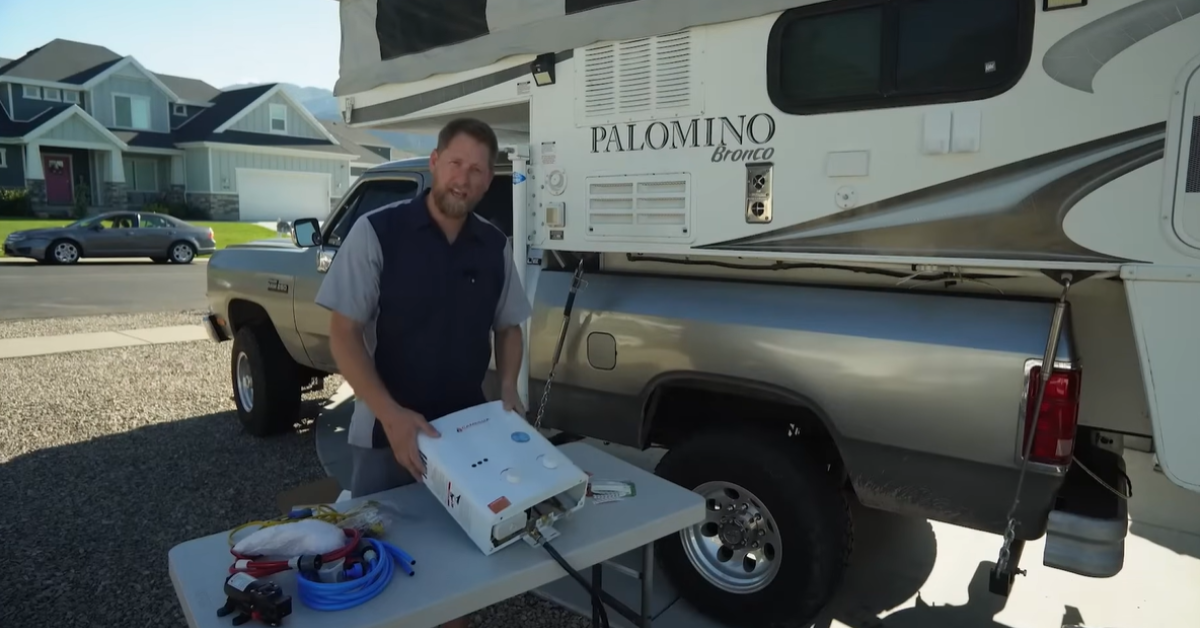
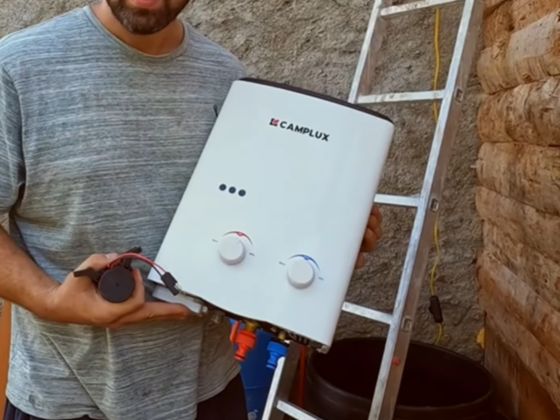
Choose corrosion-smart gear from the start
If you're still shopping—or comparing models for a second setup—these details pay off long term (you’ll find them on brands like Camplux):
-
External panels and fasteners. Favour stainless hardware and quality coatings on any painted steel parts. Ideally, screws, washers, and brackets should be stainless or similarly corrosion-resistant and not mixed randomly with plain steel.
-
Edges and drain paths. Look for folded, finished edges and drip points rather than raw, sharp cut lines. Small details like drain holes at the lowest points help water escape rather than pool.
-
Heat-exchanger material. Copper conducts heat brilliantly and is common; stainless can be more corrosion-tolerant in some environments. What matters most is keeping scale off and water moving.
-
Hoses and clamps. UV-resistant gas hoses and stainless clamps are a must outdoors. Avoid gear that already shows surface rust in the box—if it starts rough, it rarely improves.
Even if your heater's already on the wall, you can upgrade fasteners and fittings over time. Spending a few dollars on better screws and isolating washers is one of the highest-ROI tweaks you can make.
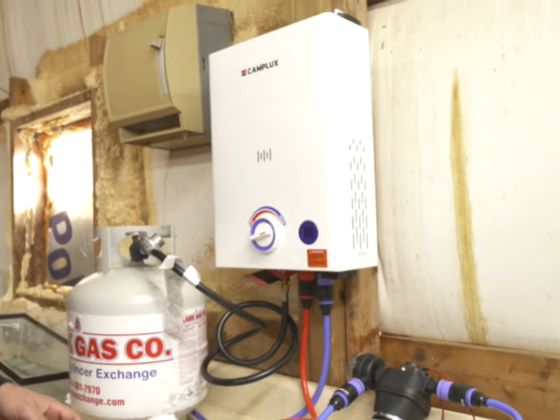
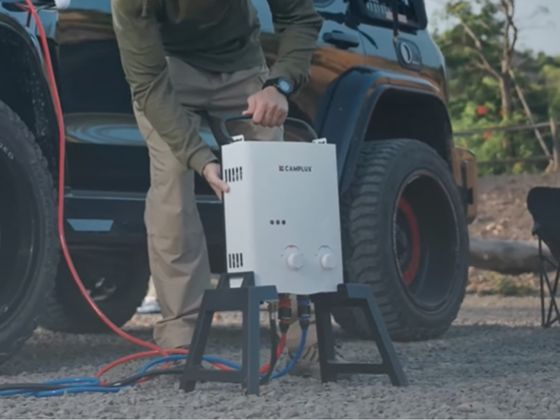
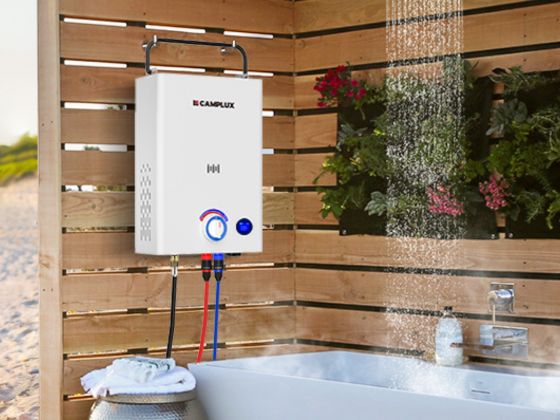
Mounting and placement: stop the wet from sitting
Corrosion is a patience game: if water can sit, it will. Change the geometry and you win.
-
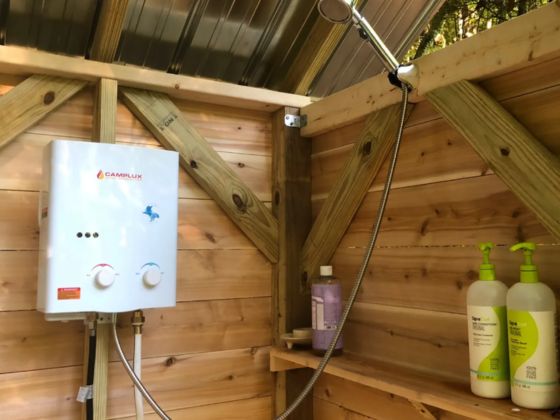
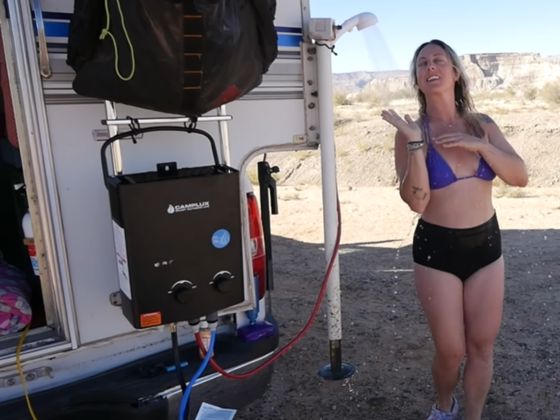
Keep it off the splash and spray. Don't mount a heater directly in the shower spray or where the sea breeze hits it full-tilt. Choose a ventilated, shaded spot—under an eave or awning works—while maintaining safe, clear exhaust paths.
-
Stand-offs and air gaps. Use spacers or a mounting plate so the back of the unit isn't pressed tight to a wet wall. A 5–10 mm gap lets air flow and water drain.
-
Mind the fasteners. Where a stainless screw goes into a galvanised bracket, add a nylon or fibre washer to reduce metal-to-metal contact (that helps curb galvanic corrosion).
-
Direct water away. If the unit sits above pavers or a deck, a slight tilt or drip edge stops water tracking back. Avoid locations where leaves collect; rotting litter traps moisture against metal.
Water quality: scale is corrosion's best mate
Hard water doesn't just look ugly on the shower rose—it affects the heater internally.
-
Filter the inlet. A small inline strainer before the heater stops grit and reduces abrasion. Clean it regularly.
-
Consider portable softening or anti-scale cartridges. Caravan-friendly filters help lower scale. Even a basic setup makes descaling easier later.
-
Descale on a schedule. For soft water or occasional use, every 3–6 months may be fine. If you're in hard-water country or using the unit daily, aim for monthly or bi-monthly.
-
How to descale (simple method):
-
Turn off gas and water. Let the unit cool.
-
Isolate the heater from your normal water supply if possible.
-
Mix a mild citric-acid solution in a bucket (follow product directions; mild is key).
-
Circulate through the water circuit with a small utility pump for 20–40 minutes.
-
Flush thoroughly with clean water until it runs clear and neutral.
-
Reconnect, check for leaks, and relight per the manual.
-
-
Don't go nuclear. Avoid strong acids, pool chemicals, or anything containing bleach. They can pit stainless, damage seals, and leave residues. Mild, patient descaling is safer.
By controlling scale, you reduce hotspots and damp pockets—both speed up corrosion if left alone.
Mixed metals: reduce galvanic bites
When two different metals are joined in the presence of an electrolyte (water), one can sacrifice itself to save the other—often the bit you didn't expect.
-
Know your neighbours. Common heater plumbing includes stainless, brass, copper, and galvanised steel. If you mix them, isolate them.
-
Use isolating washers and tape. Nylon washers between stainless screws and painted steel, and good-quality thread tape or compound on brass-to-steel connections, help break the circuit.
-
Keep joints dry. A tiny leak makes the perfect electrolyte. A half-turn on a clamp or a fresh washer beats replacing a fitting later.
-
Upgrade clamps and brackets. Stainless clamps on water lines, UV-resistant hose, and anti-seize on stainless threads (so they don't gall) are small wins that add up.
Cleaning and protective coatings that actually help
A clean, dry surface corrodes far slower than a salty, damp one. The trick is to remove the nasties and leave a light, safe barrier.
-
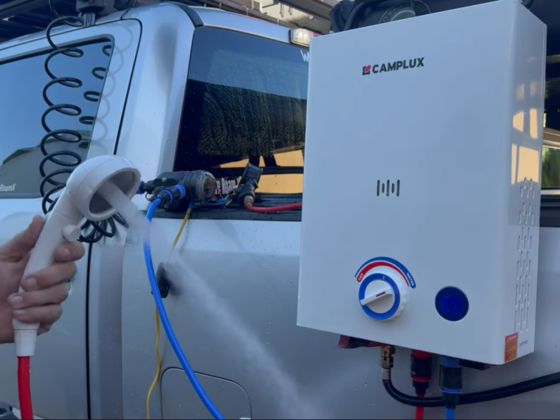
After salty or dusty trips, rinse with fresh water. Use low pressure. You're not washing a ute tray here—avoid forcing water into vents, controls, or the burner area.
-
Let it dry fully. Open the cover (if your model allows), leave the unit in a breezy spot, and give it time. Wiping with a soft, non-abrasive cloth helps.
-
Add a light protective film. A lanolin-based, wax-like, or dry-film PTFE spray on non-hot, non-sensor exterior surfaces creates a moisture-shedding layer. Do not coat burners, flame sensors, or flues.
-
Avoid harsh chemicals and abrasive pads. No bleach, no strong acids, no steel wool. They create micro-scratches and chloride-rich residues that invite pitting.
-
Touch-up promptly. If you notice a chip in a painted panel, clean, dry, and seal it. A tiny dab of compatible touch-up or cold-galv on non-hot steel (well away from flames) is better than leaving bare metal.
Think "gentle and frequent" rather than "aggressive and rare".
Your easy maintenance rhythm
Below is a practical checklist you can screenshot and keep. Adjust the frequency based on how often and where you use the heater.
After each salty, sandy, or muddy outing
-
Fresh-water rinse of the exterior, brackets, and fittings
-
Shake or blow water out of crevices; soft-cloth dry where you can reach
-
Crack the cover (if the design allows) for airflow until fully dry
-
Quick look for drips, white crust (salts), green/blue tint (brass/copper oxidation), or rust flecks
Monthly (or every 10–15 uses)
-
Clean inlet strainer
-
Check all hose clamps and threaded joints for snugness and dryness
-
Wipe the casing and brackets; reapply a light protective spray to exterior surfaces (not on burners or sensors)
-
Inspect gas hose for UV cracks or stiffness; replace if suspect
Quarterly (or more often in hard-water regions)
-
Descale the water circuit using a mild citric-acid method
-
Inspect for paint blisters, bubbling, or tea-staining (brownish tint) on stainless; tidy and protect
-
Verify drain paths are clear; no leaf litter or mud nests around the unit
Annually
-
Deeper inspection of the burner area and heat-exchanger surfaces (what you can safely see without dismantling)
-
Replace any perished seals, hose washers, or suspect clamps
-
Review your mounting location—has the environment changed (new irrigation spray, closer sea breeze)?
-
Photograph the unit and keep a simple log. It helps with warranty and future troubleshooting.
Coastal life: special tactics for the sea breeze
-
Rinse more, protect more. If you're within a few hundred metres of the surf, add a light rinse after any breezy day—even if you didn't use the heater. Salt lands invisibly and starts work immediately.
-
Store thoughtfully. If it's a portable unit, stash it indoors in a dry, ventilated spot when not in use. A breathable cover beats a plastic bag that traps moisture.
-
Shield without smothering. A simple windbreak or side panel can reduce direct salt spray. Never enclose a heater so tightly that exhaust or intake is restricted.
-
Mind the hardware. Coastal air finds cheap screws first. Upgrade to stainless fixings where practical and keep a small box of spares.
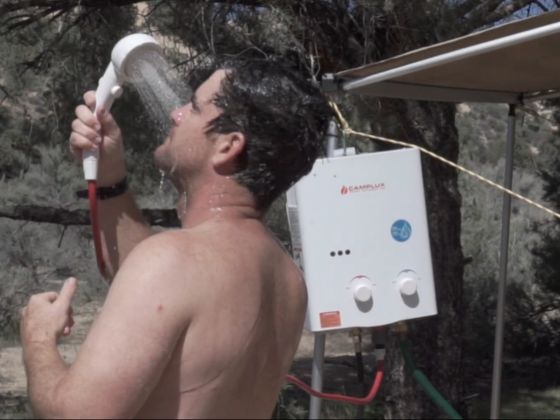
Touring, off-grid, and job-site use
-
Dust control. Use a breathable cover during transport. After a dusty run, blow out loose grit gently and wipe down before storing.
-
Box it smart. A ventilated crate or mounting board keeps the unit off muddy ground and reduces accidental knocks.
-
Don't pack it wet. It's tempting to throw everything in the ute and go—but wet metal inside a closed tub is corrosion heaven. Ten minutes of drying now saves hours later.
-
Fuel-line discipline. Check the bottle connection and hose each pack-up; vibration loosens fittings over time. A tiny leak also accelerates corrosion around the joint.
Winter and downtime protection
Even in milder Aussie winters, alpine trips and frosty mornings happen. Water expands when it freezes—cracking a fitting or warping thin metals and inviting rust later.
-
Drain it down. If the overnight low is heading near zero, drain the water circuit after use. Many portable heaters have a simple drain or you can disconnect hoses and tilt to empty.
-
Store warm and dry. For long breaks, bring the unit inside a shed or cupboard where it stays dry and above freezing.
-
Avoid aggressive antifreeze. Domestic heaters aren't designed for glycol cocktails. Draining and drying is the safer route.
-
Manage condensation. On cold mornings, a short warm-up run followed by a minute of airflow helps push moisture out before storage.
Spotting early warning signs (and what to do)
Catch issues when they're small and you'll rarely need big repairs.
-
Brown freckles or "tea-stain" on stainless. That's chloride action starting. Clean with a mild stainless cleaner (non-chloride). Dry and apply a light protective film.
-
Bubbling paint or soft patches. Moisture has crept under the coating. Clean, dry thoroughly, and seal the area. If metal is thin or flaking, consider replacing the panel or bracket.
-
White powder on galvanised parts. Often zinc oxide from weathering. Brush off gently, keep dry, and consider a protective wax or lanolin-based layer.
-
Green/blue haze on brass or copper. Check for a tiny leak. Fix the drip, clean, and dry; apply isolating tape or washers if dissimilar metals meet.
-
Persistent damp under the unit. Trace it. Is it splashback, rain ingress, a weeping joint, or condensate? Re-angle, seal, or service accordingly.
-
Flame or performance changes. Sputtering, unusual flame colour, or frequent shut-offs need attention. Do not spray anything near burners or sensors—get a licensed gasfitter to assess.
If you're ever unsure, err on the side of safety. Water and gas aren't a great combo to "wing".
Safe fixes only—don't create a new problem
A few well-meant habits cause trouble:
-
Pressure-washing into vents. Water gets behind panels and sits where you can't dry it. Rinse low and gentle instead.
-
Blanketing with plastic. A tight, non-breathable cover traps humidity. Choose breathable or leave ventilation gaps.
-
Spraying everything. Protective sprays are great on exterior metal but never on burners, flame rods, or sensors.
-
Mixing any old metal. Swapping a rusty mild-steel screw for a random zinc-plated one beside stainless hardware invites galvanic problems. Upgrade thoughtfully and isolate.
A simple "set-and-forget" kit list
Throw these into a small caddy that lives with the heater:
-
Soft microfibre cloth, soft brush, and a low-pressure spray bottle
-
Mild stainless-safe cleaner and a lanolin/wax/ dry-film protectant
-
Nylon washers, thread tape/compound, a few stainless screws and clamps
-
Spare hose washers and an inlet strainer screen
-
Citric-acid descaler and a cheap utility pump for periodic flushes
-
A notepad (or phone notes) for dates and quick photos of maintenance
If the kit is within reach, you'll actually use it.
Frequently asked (Aussie-flavoured) questions
Do stainless units really rust?
Stainless resists rust, it doesn't ignore chemistry. Chlorides (salt) and stagnant moisture can cause tea-staining and pitting. Keep it clean, dry it, and protect it lightly—especially near the coast.
How often should I descale in hard-water areas?
If you're on the road through mineral-rich regions or running daily, monthly or bi-monthly is a good rhythm. If usage is casual and water is softer, you can stretch to 3–6 months. Listen to performance: longer heat-up times and noise often mean scale.
What's the best protective spray?
Look for lanolin-based, waxy, or dry-film PTFE protectants labelled safe for metals. Apply lightly to exterior metal only—not on hot surfaces, burners, or sensors.
Can I mount the heater in fully open weather?
It's designed for outdoor use, but constant rain and direct spray will shorten its life. A ventilated, sheltered position dramatically reduces corrosion while staying safe for combustion.
Do I need a pro for gas bits?
If the job touches gas supply or combustion, use a licensed gasfitter. Routine cleaning, drying, and descaling of the water side is normal owner maintenance.
Put it all together: the "Aussie three-step" habit
-
Place it smart. Sheltered and ventilated, with drain paths and stand-offs so water can't sit.
-
Keep it clean and dry. Fresh-water rinse after salty or dusty exposure, proper drying, and a light protective film on exterior metal.
-
Control the water inside. Filter, descale gently on a schedule, and drain for frosts or long breaks.
Stick to those three and you'll avoid 90% of corrosion drama.
Final word
LPG water heaters are built to live outdoors—but "outdoors" in Australia covers everything from sea mist to red dust. Corrosion isn't a mystery or an inevitability; it's just physics and patience. Choose corrosion-savvy parts, mount with airflow and drainage in mind, keep surfaces clean and dry, and treat hard water as something to manage, not ignore. Do that, and your heater will keep delivering hot showers at the beach, on the farm, beside the van, and at home—without turning into a flaky, squeaky eyesore.
If you're setting up new gear or planning a coastal trip, use this guide as your playbook. Ten quiet minutes after each run pays you back with years of reliable hot water and fewer replacement parts. That's money in your pocket and more time doing the fun bits.