


G'day, mates! Ever finished a long day in the Aussie bush and thought, "I'd wrestle a croc for a hot shower right now"? Well, no need for reptile wrangling – with a portable gas hot water heater on hand, you can enjoy a steaming outdoor hot shower under the stars. Setting up a safe outdoor hot shower is easier than you think. The following content included some steps, safety tips, a few light laughs, and some know-hows. Whether you're camping off-grid or sprucing up a remote cabin, these best practices will have you bathing in warm, safe in no time. So grab a cuppa (or maybe your toolbox) and let's get started on setting up your portable hot water system – safely and Aussie style!
What You'll Need for a Bush Bath (Gear Checklist)
Before you can luxuriate in your outdoor propane hot water heater shower, make sure you've got all the necessary gear. Here's your checklist for a typical portable hot water shower setup:
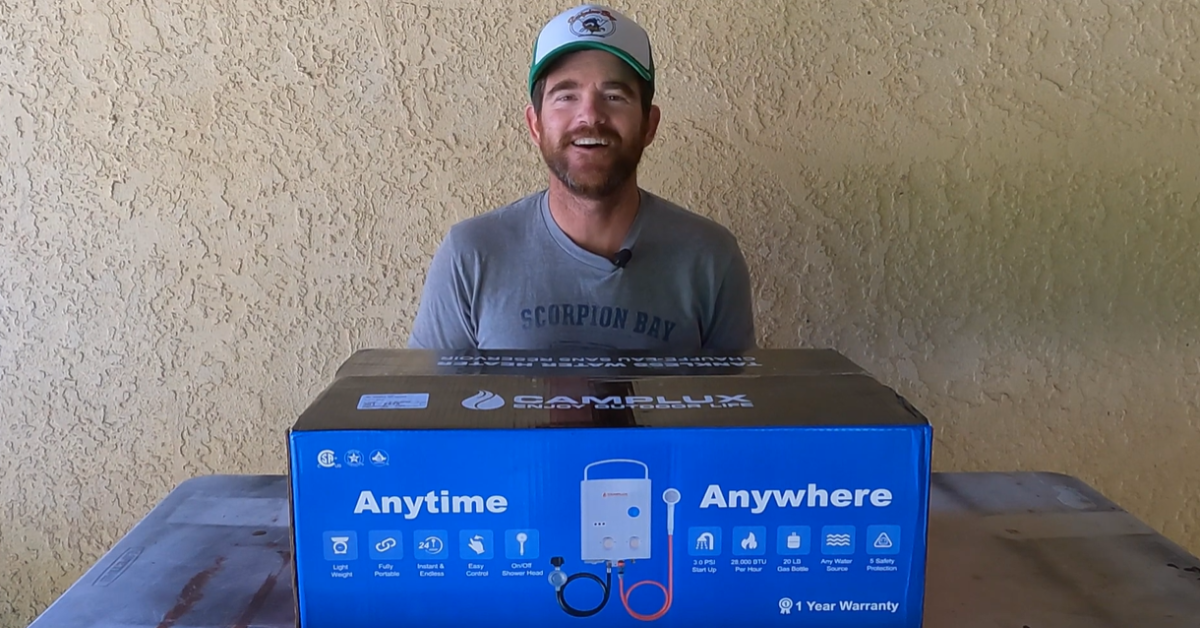
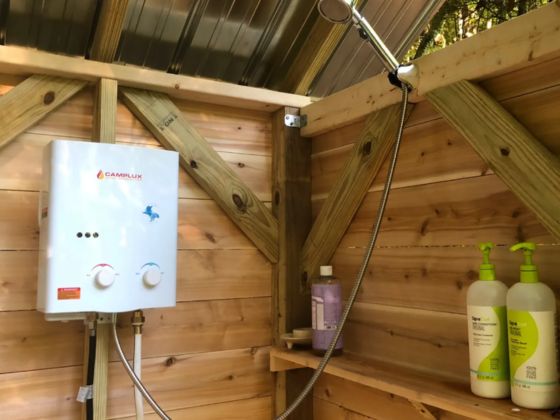
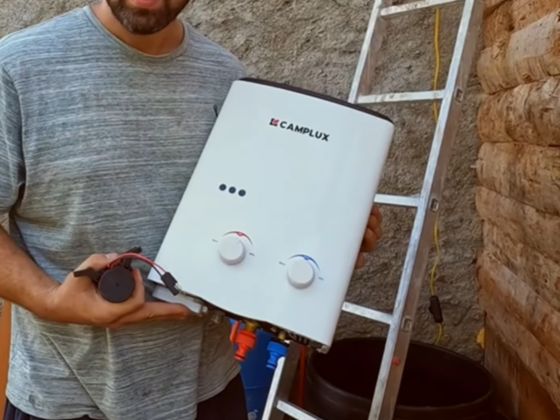
- Portable Gas Hot Water Heater: The star of the show. This could be a Camplux or similar portable hot water system that runs on propane/LPG. These units are designed for camping – compact, tankless, and often with a carry handle for easy setup. (Brands like Camplux are popular in Australia for their reliable LPG camping heaters.)
- LPG Gas Bottle (Propane Cylinder): Your fuel source. Common sizes are 4.5kg or 9kg BBQ gas bottles. Ensure your cylinder is filled and in good condition (check that it's within its test date as required by Aussie regulations). Don't forget the gas regulator and hose – most portable heaters come with an AGA-certified regulator to connect to standard LPG bottles.
- Water Source: You'll need water to heat (obviously!). If you're at a campground or home, a garden hose connected to a tap is perfect. If you're off-grid, have a jerry can, water drum, or bucket of fresh water. Many portable systems have a pump or some parts that can draw water from a container. Make sure you have a power source (like a battery box or portable power station) to charge that up if needed.
- Shower Hose and Showerhead: Usually included with the heater unit. This attaches to the heater's hot water outlet and is what you'll actually shower under. Many have an on/off trigger on the showerhead to save water.
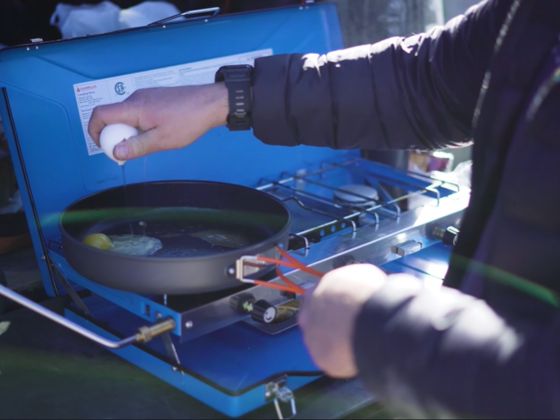
- Batteries: Most portable gas water heaters use batteries (often 2 x D-cell) for ignition. Pack a fresh set of D batteries so the electronic ignition will spark up your burner. (No electricity required beyond that – truly off-grid friendly!)
- Miscellaneous Items: A wrench to tighten connections, soapy water for leak testing, and a lighter or matches if the unit requires manual ignition (most ignite automatically, but some are not). Have a fire extinguisher or a bucket of water on hand during setup, just in case anything related to fire go wild accidentally. Optional but nice to have: a shower tent (remember, keep the heater outside the tent), a mat to stand on, and maybe a sturdy hook to hang the showerhead.
Alright, got your gear? Beauty. Now let's set it up step by step.
Step 1: Choose the Right Location (Ventilation is Vital)
Safety first, folks – picking the proper spot for your shower setup is key. Always set up your propane hot water heater outdoors in a well-ventilated area. These gas units burn fuel and produce exhaust, including carbon monoxide, which can be deadly if concentrated. That means absolutely no using the heater inside a tent, caravan, van, or enclosed bathroom – outdoor means outdoor, under open sky or a roof with ample open sides. If you're using a privacy shower tent, keep the heater itself outside the tent (run the shower hose inside). You get fresh air for the heater and a private space for you. Win-win.
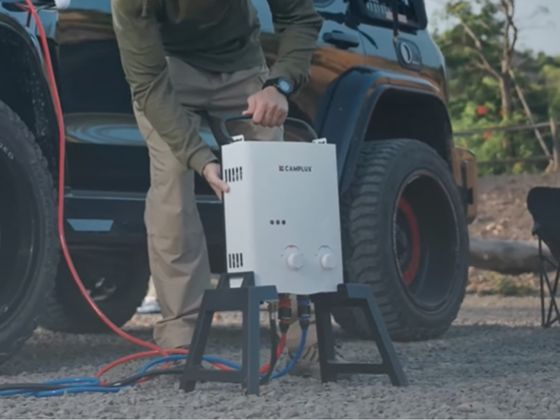
Look for a level, stable spot to place or hang the unit. Most portable heaters like the Camplux have a folding handle or brackets so you can hang it on a tree branch, camper, or hook about waist-to-shoulder height. Hanging is great because it keeps the heater off the ground and at a convenient height to reach the controls. Whether hanging or placed on a table/stand, make sure the unit is secure and won't tip over. (Many heaters have a tip-over safety switch that cuts gas if it falls over more than 45° – a handy feature, but let's not test it intentionally!).
Keep clearances around the unit. The top gets hot (that's where the exhaust comes out), so there should be nothing overhead – no low tree branches, awnings, or tarps for at least a metre or two above. Same goes for stuff around the sides and front: no flammable materials (canvas, leaves, gas canisters) nearby. Also avoid placing the heater right on top of dry grass or leaf litter; the heat output could singe them or even spark a fire in a worst-case scenario. A bit of wind is fine, but avoid very windy spots if possible – a strong gust could blow out the flame or mess with the heater's performance. If it's breezy, orient the unit so the back faces the wind, or use a wind break, but never fully enclose the heater.
Lastly, situate everything a safe distance from your living area. Place the heater a few metres away from your tent, camper, or campfire. This keeps any gas exhaust well away from where people are sleeping, and avoids water splashing all over your sleeping gear. Keep the gas cylinder at ground level, upright, and to the side of the heater – usually the length of the hose is a good separation. In short: open air above, nothing flammable around, and good stability. Now we're ready to hook things up. For placement and airflow specifics, see this guide on proper ventilation.
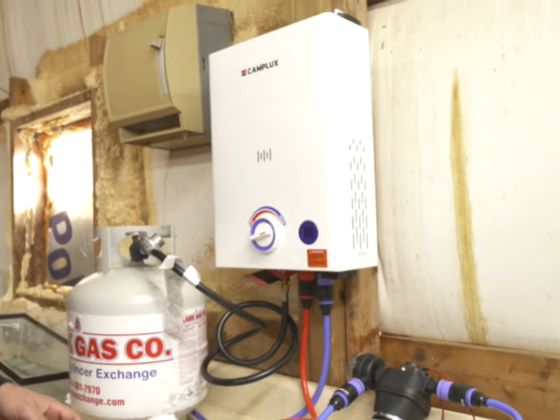
Step 2: Hook Up the Gas Bottle Safely
Time to fuel up your hot water system! Portable camping heaters run on LPG (liquid propane gas) – the same gas that fires up the barbie – supplied via a gas bottle. Safe gas connection is crucial, so let's do it step by step:
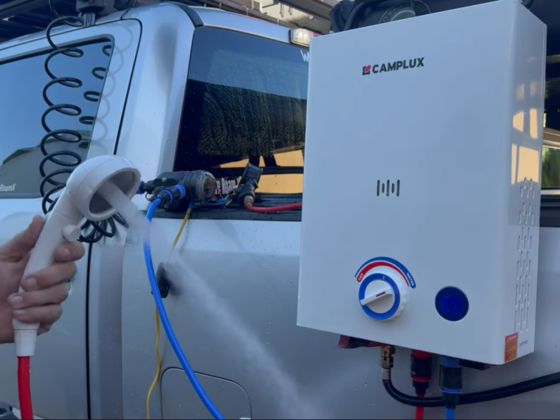
- Check the Regulator and Gas Hose: Ensure you're using the manufacturer-provided gas regulator and hose, which should be AGA certified for Australian LPG bottles. Don't jury-rig a different hose or use an unregulated gas source. The regulator maintains the correct pressure from the bottle to your heater. Inspect the hose for any cracks or damage. If something looks dodgy, don't use it. Safety first.
- Attach the Regulator to the Gas Bottle: Make sure the gas bottle valve is fully closed (turned off tight) before you begin. In Australia, most LPG cylinders have a POL fitting – that's a reverse thread connector (you screw it in counter-clockwise to tighten). Insert the regulator's brass connector into the bottle's valve and turn opposite to usual until it's snug. You might have a handwheel on the fitting; hand-tighten it firmly. If not, use a spanner to give it a final tighten – but don't over-tighten like a gorilla, just enough to seal.
- Connect the Hose to the Heater: Now take the other end of the hose and attach it to the heater's gas inlet (a brass threaded stub usually at the bottom of the unit). Screw it on clockwise (normal thread here) and hand-tighten until secure. A gentle nip with the wrench can ensure it's snug, but again, no need to crank it with all your might.
- No Teflon Tape on Gas Fittings: Here's a pro-tip that many get wrong – do NOT use plumber's (Teflon) tape on these gas connections. Quality portable heaters (like Camplux) use rubber O-rings or gaskets in the fittings to make a gas-tight seal. Adding tape can actually prevent a proper seal and cause leaks. So if you were about to wrap that thread in tape – skip it. The provided fittings are designed to seal as-is.
- Perform a Leak Test: Before firing up, always leak-test your gas connections – every time you set it up. It's quick, easy, and could save your life (or at least save you from a singed eyebrow). Mix a bit of dish soap with water in a bowl, or use a spray bottle with soapy water. Make sure the heater's gas knob (if it has one) is off, then slowly crack open the gas bottle valve (just a small turn to pressurize the hose). Slather the soapy solution around all connection points – the junction at the gas bottle, and where the hose connects to the heater. Watch for bubbles. No bubbles? You're all good – connections are tight. See growing bubbles? That means gas is leaking. Immediately turn the gas back off. Tighten the connection or check the O-ring, then test again. Only proceed when no leaks are detected. Never use a flame to check for gas leaks – the soapy water method is the safe way to pinpoint leaks.
- Final Gas Safety Checks: Now that everything is connected and leak-free, double-check a few things: The gas bottle should remain upright at all times (never lay a gas cylinder on its side while in use!). Keep the bottle and hose a safe distance from the heater – the full length of the hose is usually fine. Also, ensure there are no open flames, lit cigarettes, or campfires right next to your setup during this process (common sense, but worth stating). Having a fire extinguisher or at least a bucket of water nearby is a good precaution whenever you're dealing with gas. If you smell gas at any point, shut off the bottle immediately and figure out why – don't ignite anything until the smell is gone and the issue is resolved.
Gas hooked up and safe? Good on ya! Now for the wet stuff. If you’re still choosing cylinders, here’s how to pick the right gas bottle.
Step 3: Connect Your Water Supply
With the gas sorted, let's get the water flowing. One big benefit of a portable hot water system is it can use various water sources. You have two main options:
Option A: Tap (Mains) Water – If you're at a powered campsite, home base, or anywhere with a garden tap, this is the easiest. Attach a garden hose to the heater's water inlet. Most portable heaters have a standard ½ inch hose connection or come with adapters to fit a regular hose snap-on connector. Simply click or screw your hose onto the inlet. Make sure there's a rubber washer in your hose fitting to prevent leaks. Keep the water turned off for now – we'll turn it on when we're ready to ignite. But do ensure the connection is hand-tight and secure (no O-ring = add one, or you'll have leaks).
Option B: Off-Grid (Pump from a Container) – If you're in the boonies with no tap, you'll likely use a 12V water pump to feed your shower. Many portable heater kits (Camplux 6L, etc.) even include a small submersible pump for this purpose. Here's how to set it up: - Place your water container (jerry can, bucket, etc.) near the heater. It's smart to have plenty of water – a 20L jerry can can give several quick showers, but more is always merrier. - Attach the pump's intake hose and fully submerge the pump in your water source. It should sink to the bottom so it can prime (fill with water) properly. If the pump sucks air, you'll get sputtering and possible overheating. - Connect the pump's outlet hose to the heater's water inlet. Many pumps have a quick-connect fitting that snaps into the heater. For example, Camplux pumps use a color-coded quick connector that makes this plug-and-play. Ensure it clicks firmly into place or is tightly screwed on. - Double-check all hose connections on the inlet side. Give the hose a gentle tug at the heater – a loose hose might pop off under pressure and give you an unexpected shower before you're ready! If your heater has an inlet filter screen, confirm it's clean (especially if using creek or river water – you don't want sand or gunk clogging your heater). You can also pop a simple mesh or cloth over the pump's intake as a pre-filter to catch debris. - Have your 12V power source for the pump ready (but don't turn the pump on yet). This could be alligator clips to a battery, a 12V car outlet, or a portable power pack, depending on your pump type.
Whether using a hose or pump, position your water container so the pump doesn't have to work too hard (don't put it uphill from the heater – gravity is your friend here). Also, keep the heater's water inlet higher than the container if possible when priming the pump; it helps prevent backflow. Do not turn on the water flow yet. We'll do that when it's time to ignite, so we can watch the magic happen.
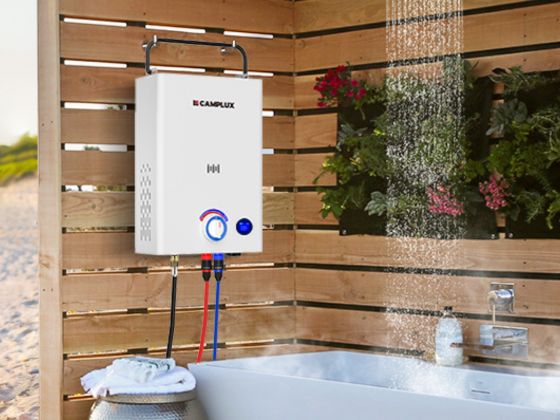
Step 4: Attach the Shower Hose and Head
We're almost ready to fire up, but you'll need a way to get that hot water from the heater to you – enter the shower hose and showerhead. Here's how to set that up:
Connect the Shower Hose to the Heater: On the bottom of your unit, you'll see the water outlet (often marked in red or labeled "outlet"). This is where hot water comes out of the heater. Take the supplied shower hose and screw it onto the outlet. It should thread on easily. Hand-tight is usually sufficient, as these hoses have a rubber O-ring that seals the connection. No need for Teflon tape here either. Ensure it's snug so it doesn't leak or pop off under pressure.
Attach the Showerhead: The other end of the hose gets the showerhead (if it's not already attached). Most camping showerheads simply screw onto the hose end. Tighten it by hand until secure. The showerhead typically has a valve or trigger to start/stop the water flow. Make sure this is in the "off" position now (closed), so that when we do turn on water, it doesn't spray everywhere immediately.
Position the Showerhead: Think about where you'll be showering. If you have a shower tent, there might be a loop or holder up top to hang the showerhead. Some kits include a little plastic bracket or hook – attach that to something stable (tent pole, a tree, the side of your roof rack, etc.) about 1.5–2 meters off the ground or whatever height is comfortable for you. If no holder, improvise – hang it on a nail in a tree or use a piece of paracord. The goal is to keep the showerhead off the ground and make it right above where you stand. Set the showerhead in a dry spot or hang it up while you finish the setup.
Check Hose Routing: Make sure the shower hose isn't kinked or tangling around the gas hose or anything. Lay it out so it can flex naturally when water flows. It should reach your shower area comfortably. Standard hoses are ~1.5m long; if you need more length, you might consider a longer hose or an extension (just ensure any extension hose is rated for hot water). Everything good? Sweet.
At this point, all your connections are done: water in, water out, gas hooked up, shower ready. Let's pause for a quick safety scan before we light this fire (literally).
Step 5: Safety Check Before Ignition
You're nearly ready for that glorious hot water, but doing a final pre-flight check is a best practice that can save you from surprises. Run through this safety checklist:
Everything look good? Brilliant. It's showtime!
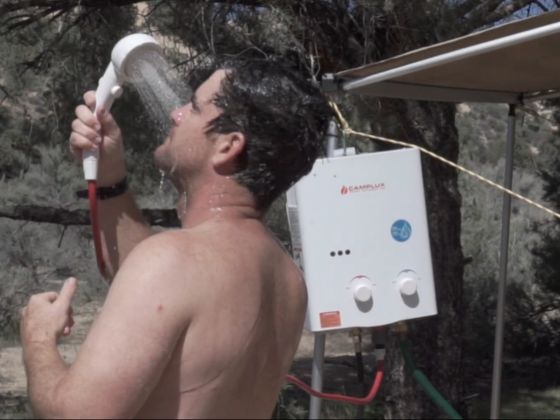
Step 6: Ignite the Heater and Enjoy the Warmth
Drum roll, please... it's the moment of truth. Let's fire up this LPG hot water system and get you under that hot shower:
- Open the Gas Valve: Go to your propane bottle and slowly turn the valve open (counter-clockwise). Open it fully (or at least a few full turns) to ensure adequate gas flow. You generally won't hear anything at this point. Sniff the air near the heater – you should NOT smell gas. But if you do smell anything strange, pause and check out the connections; it must not have been tightened nicely. Back to the sniff, smell nothing, then you can proceed.
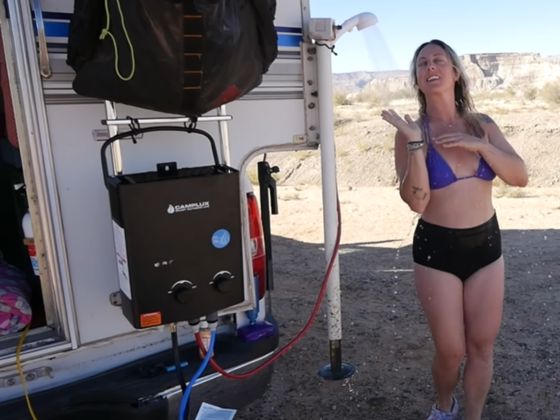
- Turn On the Water Flow: Now either open your water tap or flip the switch on your pump to start water flowing into the heater. Do this immediately after opening the gas. Water rushes in, and within a second or two, the heater's flow sensor will trigger the ignition sequence. You'll likely hear a rapid clicking sound – that's the igniter spark – followed by a "whoomp" or soft woosh as the gas flame ignites inside the heater. Congrats, you should now have hot water coming out of the showerhead! 🎉
- Check the Flame and Output: Once it's lit, take a quick look or listen at the heater. Most models have a little viewing window where you can see the blue flame. You should hear the gentle roar of the burner. Some advanced units even have a digital display showing the water temperature. Everything sounding steady? Good.
- Adjust Temperature to Your Liking: Carefully test the water coming out of the shower (just feel it with your hand). It's likely warm already, but you can adjust it to the perfect temp. Remember the rule: more gas = hotter water
- Shower Time! You've done it – you have a stream of hot water in the middle of nowhere. Stand under that showerhead and enjoy 😊. Lather up with some eco-friendly soap (keep it nature-friendly if you're camping, please) and relish the warmth easing your sore muscles.
If the burner doesn't light on, don't panic. This can happen if the gas tank is so full that and stops the gas from going through the regulator, or maybe the water you feed in is minor than the lowest setting(which will not be able to activate the water heater). Turn it off, double-check the gas source, water feed, then restart it. Typically, these units fire up straight away if everything is hooked up correctly. If you hear clicking but no whoosh, the gas might not be reaching – check the bottle valve and regulator. If you hear nothing at all, check those batteries and that any power switch is on (we've all forgotten the simple stuff!). But 9 times out of 10, you'll get ignition on the first attempt.
more water flow = cooler water
So if it's too cool, you can either turn up a little of the gas knob for more heating power or turn down a little of the water flow knob so the water go though will be cut down, with the same fire output, lower water flow, higher temp. Make any adjustments slowly and give the heater a few seconds to respond. Aim for a comfortable temperature like a home shower – usually in the 38–45 °C range. Be cautious, because these little heaters can pack a punch; on maximum settings, water can get extremely hot (some units can exceed 50 °C, which can scald you in seconds). Always starting it from the lowest temp setting will be good to you, the people who are showering with and the heater's burner. So you won't be surprised by the suging heat.
A couple of usage tips while showering: Don't point the showerhead at the heater or spray water onto the unit – they are weather-resistant but not designed to be hosed down. Also, avoid extremely long continuous showers if your unit has a 20-minute safety shutoff (many portable heaters will automatically turn off the flame after ~20 minutes of continuous use as a safety feature). If you're indulging in a longer shower, you might have to turn the water off and back on to reset the timer – or just finish up and enjoy a cuppa by the campfire instead. 😉
When everyone's squeaky clean and happy, it's time to shut the system down properly.
Step 7: Shut Down and Pack Away Properly
Resist the urge to run off into the sunset now that you're clean – taking a few minutes to safely shut down your portable shower setup will prolong its life and ensure safety. Here's what to do:
- Turn Off the Gas First: Go to the LPG bottle and firmly close the valve (turn it off all the way). Cutting the gas before the water ensures that as the flame uses up the last bit of fuel in the line, it will die out cleanly. You might see the flame flicker and go out. This way, once you turn off the water a moment later, you won't have unburned gas sitting in the heater.
- Turn Off the Water: Now shut off the water flow. If you're on a pump, switch the pump's power off. If you're on a tap, close the faucet. Then open the showerhead trigger briefly to relieve any pressure in the hose until water stops flowing out. This depressurizes the system.
- Drain the Heater (if needed): If you're packing up for a while or camping in cold conditions, it's wise to drain any water from inside the unit. Many portable heaters have a drain plug or valve at the bottom – open that up and let any remaining water trickle out. Give the heater a little shake if safe to do so (it might still be warm, careful) to clear water from the heat exchanger. This prevents water from freezing inside, if it's frozen inside and the pipe will burst to leak once you start it. The heat of the burner and the ice inside will affect the pipe at the same time, making it burst. And draining this will also avoid corrosion from building up. If it's not going to freeze and you'll use the heater again tomorrow, you can skip the full drain, but it's generally good practice for long-term storage or freezing temps. In cold seasons, see tips for Australian winters.
- Let it Cool: The heater components will be hot right after use (no surprise). Allow a few minutes for everything to cool down before you start handling it too much. These units cool off fairly quickly once the burner is off, but metal parts could still be hot. Go tidy up your shower toiletries or get dressed, then come back to finish pack-up.
- Disconnect Hoses and Gas: Detach your garden hose or pump hose from the water inlet. Be aware some water may still be in the hose – disconnect it over a spot that can get wet. Also unscrew the shower hose from the heater's outlet. If water dribbles out, that's normal. Shake out excess water from the hoses. Next, disconnect the gas hose from the heater (after ensuring the gas bottle is off and there's no flame). If you're breaking camp, it's a good idea to also unscrew the regulator from the gas bottle and securely cap the bottle for transport. If you're moving just a short distance or will use the bottle later that day for the BBQ, you might leave it connected, but always turn the gas valve off.
- Pack it Up: Once everything is cool and detached, pack your gear. Avoid simply tossing it in the back of the ute – these are appliances that last longer with a bit of care. Coil up the shower hose and pump wiring neatly. Store the showerhead and small parts in a container or bag so they don't get lost or filled with dirt. If the heater has a carry handle, use it; if it came with a storage bag or you kept the box, even better – that protects it during transport. Make sure the unit is fairly dry before boxing it up to prevent mold or corrosion during storage. If you're in a hurry and have to pack it wet, be sure to dry it out when you hit the next destination. Also, remove the batteries; it's a good habit, and it's like every other appliance that you need to insert batteries.
Congrats, you've successfully set up, enjoyed, and packed down your outdoor hot shower! After doing it once, you'll find the whole process is pretty quick – next time it might only take you 5 minutes to get everything ready. Now that we've gone through the how-to, let's talk about some extra safety tips and common mistakes to steer clear of, just to make sure your hot shower remains drama-free.
Essential Safety Tips for Your Outdoor LPG Hot Water System
Even in the great outdoors, a few safety precautions go a long way. We've mentioned many of these during the setup, but they're worth highlighting again. Keep these tips in mind whenever you're using a portable gas shower system:
- Outdoor Use Only – No Exceptions: This bears repeating, and it's the topmost rule that needs to be highlighted. Never use a propane/LPG hot water heater in an enclosed space. Carbon monoxide is a silent killer – fatal, unable to be smelled or sensed. If you need privacy, use a shower tent or a tarp as a screen, but keep the top and sides open or the heater unit outside of any enclosure. See also: using Camplux heaters for outdoor showers.
- Maintain Safe Distances: Keep at least half a metre (50 cm) clearance (or more) around the heater for safety. That means no flammable materials, fabrics too close to the sides or above the unit. Also, position the gas cylinder away from the water heater. This reduces any fire risk and also keeps the cylinder cooler.
- Use on Stable, Heat-Proof Surfaces: If you're not hanging the heater, place it on solid ground or a sturdy table that can handle a bit of heat. Don't balance it on a plastic crate or anything that could melt or tip. Many people hang the heater by its handle on a tree or vehicle; if you do, ensure the mount is secure (you don't want it crashing down mid-shower). Remember, these units have flame inside, so stability is a safety issue – treat it like a camping stove or lantern in that regard.
- Always Perform Leak Tests: A Soapy water leak test is a must when connecting the water heater to the gas tank. Gas leaks are rare if you use the equipment correctly, but this test is the easiest way we can do for a double-check. Never use a flame to check for leaks. If you find a leak that tightening doesn't fix, swap out the hose/regulator or get the unit serviced before using it. Your nose is also a good detector – if you smell gas at any point, turn everything off and investigate. For care between trips, read maintenance tips.
- Only Use Proper LPG Fuel: Use the fuel the heater is designed for – standard BBQ propane (LPG) bottles. Don't try to hook it up to natural gas lines or other fuels not intended for the device. And don't use damaged or rusted gas cylinders. Check that your gas bottle is within test date and in good condition (no major dents or excessive rust). Replace or test older bottles as required by Australian law (10-year requalification).
- Monitor the Flame & Heat: When running, periodically glance at the heater to ensure it's burning cleanly. A steady blue flame is good; flickering or yellow flames might indicate wind issues or a need to adjust settings. Also keep an ear out for any unusual sounds or any surging in the burner. If the flame blows out unexpectedly, turn off the gas and water immediately and allow any gas to dissipate before reigniting. Most units have flame failure protection that cuts gas if the flame goes out – but don't rely on it; be attentive. For better performance tuning, see this quick guide.
- Supervise Children and Pets: A camp shower is exciting for everyone, including kids and dogs. Kids and dogs tend to touch around and cause themselves injury by accident, so always keep the water heater away from them. The unit gets hot, and the water can be scalding.
- Don't Touch Hot Parts: The exhaust area (top of the unit) and it will get super hot after using sometimes. Avoid touching the heater while it's running or right after use. Only take the handle or manage it after it's cooled down.
- Be Water-Wise (if off-grid): Not a "safety" tip, but worth noting: if you're drawing from a finite water source like a tank or creek, ensure you have enough water for the duration of your shower and that your pump won't run dry.
- Use Certified Equipment: In Australia, make sure any portable gas appliance you use is certified to meet safety standards. Camplux units, for example, carry AGA certification for compliance with AS/NZS standards. This means they include features like over-temperature protection and automatic shutoff timers for safety. Avoid cheap no-name imports that haven't been certified – they may lack critical safety features and could even be illegal to use. Stick with reputable brands (Camplux, Joolca, etc.) so you have peace of mind.
- Have Emergency Prep: It's not a bad idea to keep a small fire extinguisher in your camping kit when using any gas appliance. Also know how to cut the gas supply quickly (that is, know where the valve on your bottle is and ensure it's accessible, not jammed or stuck). In case of any flare-up or emergency, turning off the gas is the first step. And as mentioned, keep combustibles away from the setup to minimize fire risk.
- Regular Maintenance: Now and then, inspect your heater and hoses. Look for cracked hoses, worn O-rings, or dirt/bugs in the burner. Spiders, of all things, love crawling into gas burner orifices and can cause blockages (this is a surprisingly common issue in stored gas gear). Clean out dust or spider webs from the unit's interior if it's been in storage – a blast of compressed air or a soft brush does the trick. Also, if you camp often, consider replacing the gas hose every few years as the rubber can degrade. Clean the water inlet filter if your unit has one, especially after using suspect water. And of course, follow the manufacturer's maintenance guidelines in the manual for any other checks. For a simple checklist, see routine maintenance tips.
Keep these safety tips in mind, and you'll have a worry-free hot shower experience wherever your adventure takes you. For more fundamentals, here’s a beginner’s guide.
Wrapping Up
There you have it – a complete guide to setting up a safe, enjoyable outdoor hot shower, Aussie camping style. With a portable gas hot water heater like a Camplux by your side, you can transform your bush campsite or off-grid cabin into a mini oasis of comfort. No more "lukewarm sandwich" in the wild and you can scrub off the day's grime with piping hot water.
By following these best practices – from choosing a ventilated spot, leak-testing, to keeping that water at the perfect temperature – you'll ensure that your outdoor shower is not just refreshing, but also safe and hassle-free.
So next time you're planning an off-grid adventure or a weekend at a remote beach camp, pack your portable hot water system and use this guide as a reference. You'll be the envy of the campground, steaming away under your warm shower while others shiver with their solar bags.
In true Aussie fashion, setting up a hot shower in the wild is "no worries" when you know how. Stay safe, enjoy the comfort, and happy camping! Here's to many nights under the stars followed by glorious hot showers at dawn. Cheers! For more picks and setups, browse our camping gas hot water system range.