


Introduction
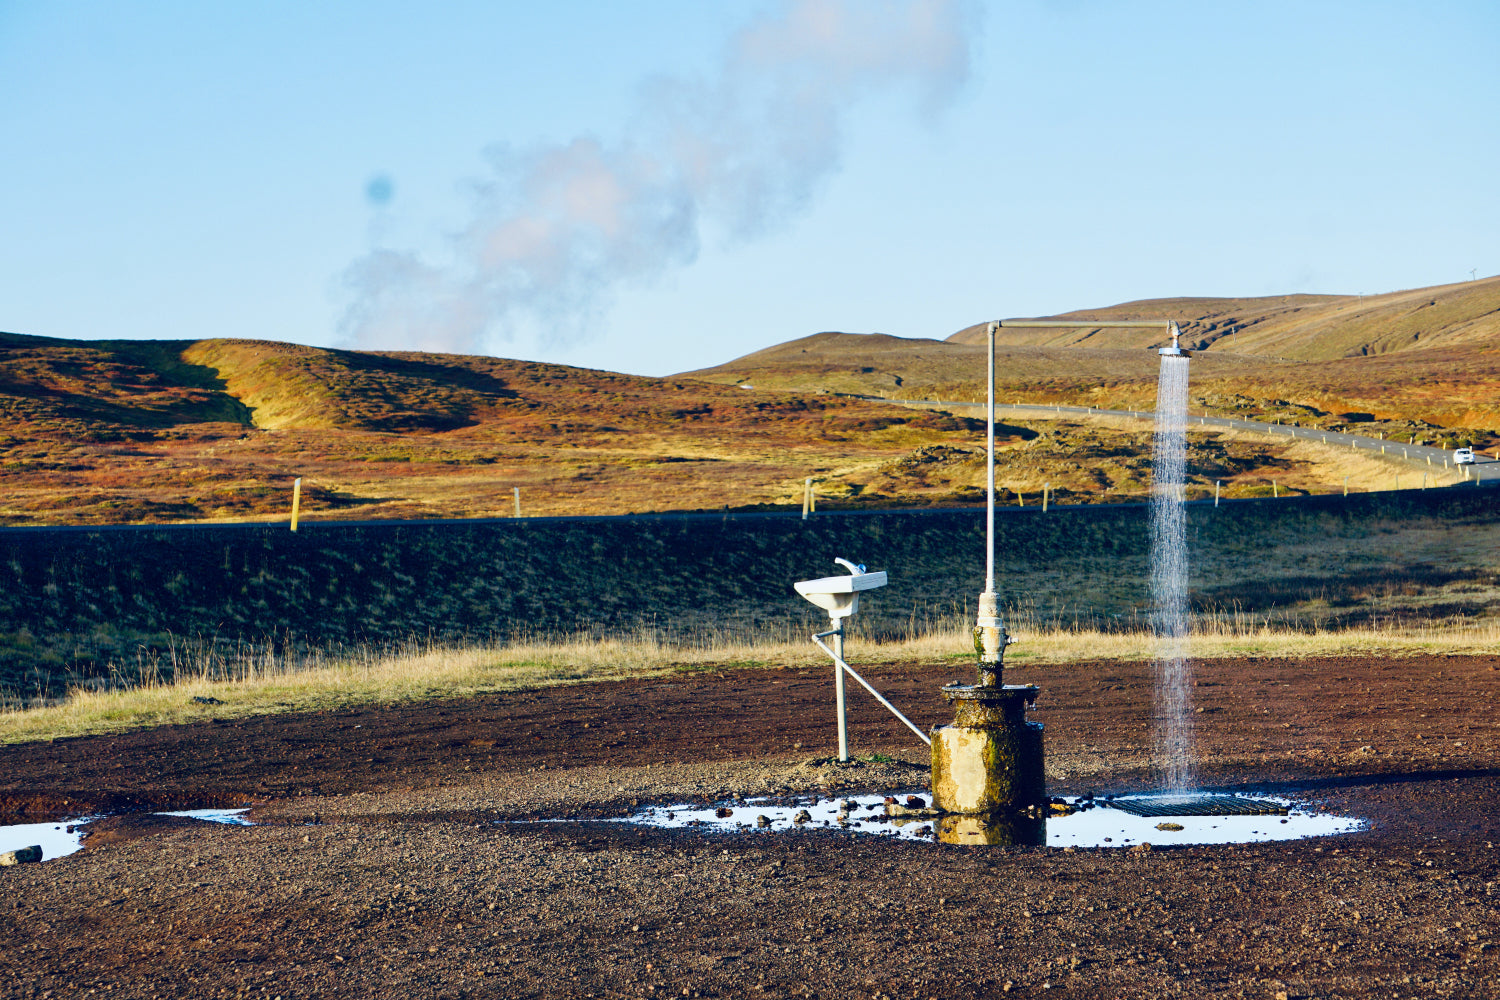
I learned the importance of ventilation the hard way. One calm evening, I set up my outdoor tankless water heater in a semi-enclosed barn to take a hot shower. With barely a breeze outside, the heater's exhaust ended up swirling back inside. Within minutes, I was feeling light-headed, and I had to cut my shower short. That experience taught me a valuable lesson: proper ventilation is crucial, not just for comfort, but for safety. No matter camping, living off-grid, or just enjoying a shower in the backyard, ensuring the gas water heater is well-ventilated is very basic and important. Let's check out the content below to learn more about how to ventilate your LPG water heater properly. In a fun Q&A style with practical tips and even a bit of friendly banter. Let's dive in, mate!
(Also for camping setups, caravans/RVs, patio installations, and off-grid homes.)
Understanding Ventilation Requirements
Q: It's an outdoor water heater – do I really need to worry about ventilation?
A: Absolutely! Even outdoors, ventilation matters a great deal. Proper ventilation means two things: supplying plenty of fresh air and effectively expelling exhaust gases. Gas water heaters need oxygen for combustion (after all, fire needs air), and they produce harmful exhaust like carbon monoxide that must be carried away from people. So it's not just about venting out the exhaust, it's also for having fresh air into the burner, which is inside the water heater. If exhaust fumes accumulate, it will stop the burner from working by shutting down and make the people around feel hard to breathe. So even in the great outdoors, ventilation is a must for safety and performance.
- Fresh Air Supply: Ensure the water heater has a source of fresh air. Without enough oxygen, the burner will not kick on. In a closed, tight space, you might need pipes or openings to let air in.
- Exhaust Removal: Make sure there's a path for hot exhaust gases and fumes to escape safely. This could be as simple as having the unit in open air, or using a flue pipe to direct exhaust outside a shelter. Never let exhaust just collect in a confined area – it contains carbon monoxide which is odourless and deadly if inhaled in large amounts.
Q: Do different types of outdoor water heaters vent differently?
A: Yes. Outdoor water heaters come in a few flavors – portable units, wall-mounted models, and sealed combustion units – and each has its own ventilation needs:
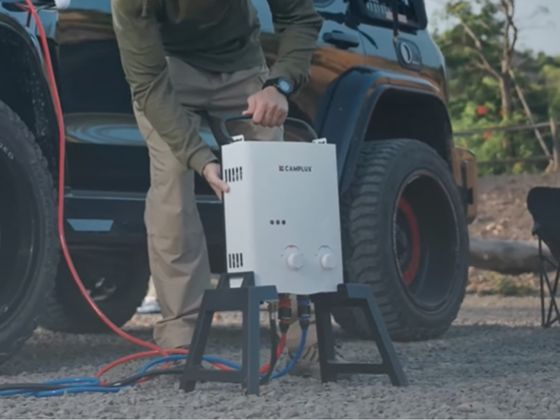
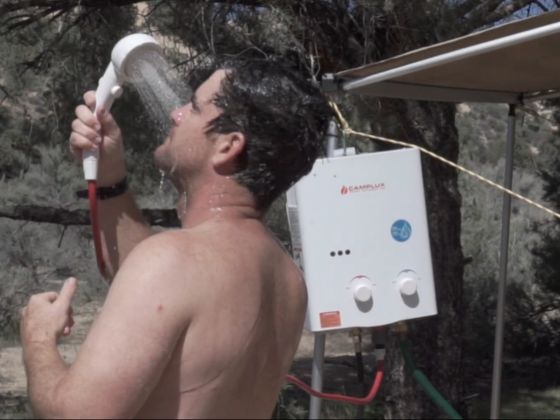
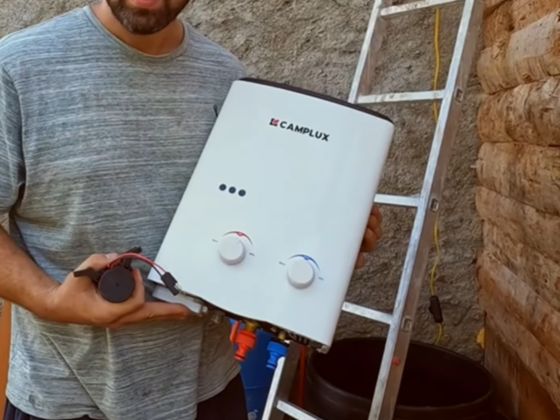
- Portable Outdoor Water Heaters: These are the camping-style, portable units (often hung on a tree or mounted on a stand). They are designed for outdoor use only, meaning they vent directly to the open air. There's no chimney or duct – the combustion fumes just dissipate outside. All you need is to use them in a well-ventilated spot (never in a tent or closed space). Manufacturers like Camplux explicitly warn never to use these in enclosed areas like campers, tents, or homes. If you ever must use one in a semi-enclosed area, you'd need to rig up a proper flue to carry exhaust out and ensure a lot of airflow (but generally, it's safer to just keep them fully outdoors).
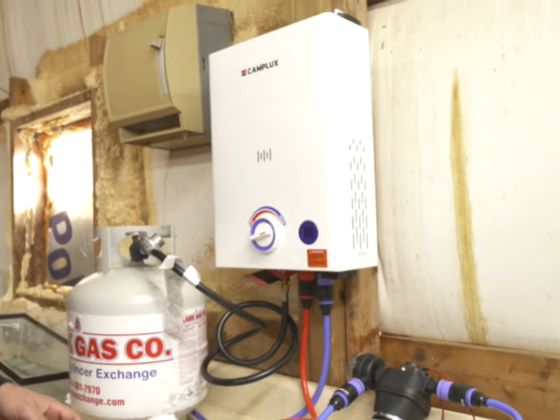
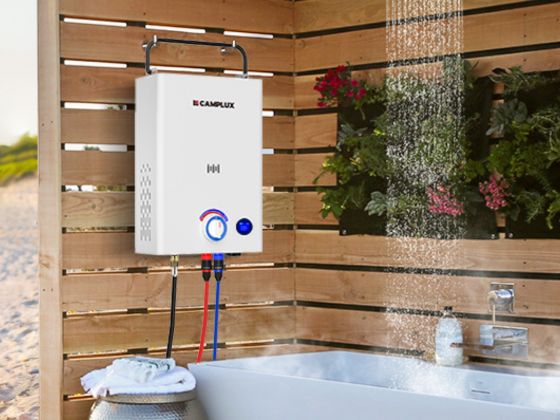
- Wall-Mounted "Outdoor" Tankless Heaters: These are fixed units you mount on an exterior wall of a building or on a post. They are built to withstand weather and typically have an exhaust vent on the front or top. Ventilation for these is usually built-in – as long as you install them in an open area according to instructions, the exhaust will mix with outside air. They do not require a separate vent pipe like indoor models, because they rely on free airflow outside. However, you still must follow clearance guidelines (e.g. how far from windows, eaves, etc.) so their exhaust doesn't cause problems. We'll cover those guidelines in the next section.
- Closed Combustion (Sealed) Systems: These are more advanced units (often indoor-rated units or RV units) that use a twin-pipe vent system – one pipe draws in outside air for the burner, and another pipe sends exhaust out. Essentially, they are sealed from the room and completely self-ventilating. If you have a unit like this in an off-grid cabin or caravan, it will have specific vent pipes you must install through a wall or roof. The good news is that sealed combustion heaters are very safe in terms of ventilation – they won't consume the oxygen in your room or leak exhaust inside, provided the vent pipes are installed correctly. Just make sure to follow the manufacturer's venting kit instructions to the letter.
No matter the type, always read the manufacturer's manual for ventilation requirements. Different models have different needs; the manual has how much open space to have around, what vent attachments are needed (if any), and other critical info. Following these guidelines helps avoid improper venting that could make the unit shut off or create hazards. When in doubt, reach out to the manufacturer!
Choosing the Right Installation Location
Q: Where should I install my outdoor water heater for the best ventilation?
A: The location is key. Pick a spot where the heater can "breathe" and blow out its exhaust without hitting anything dangerous. Here are some tips for a good location (consider this your outdoor heater feng shui checklist):
- Open, Airy Area: Place the heater in a well-ventilated, open space. An open area with no obstructions above or around is ideal so that exhaust dissipates quickly. Avoid tight corners or alcoves where walls could trap the fumes.
- Away from Doors and Windows: Keep the unit away from any doors, windows, vents, or air intakes on your house or caravan. This prevents exhaust from blowing back inside. For example, don't mount it right next to a window that right around the shower area. A common guideline, maintain about 1.2 metres (4 feet) to the side or below an opening, and 300 mm (1 foot) above any window or door, so that fumes can't sneak back.
- Not in Enclosed Spaces: This might sound obvious, but do not install an "outdoor" heater inside a closed room or roofed enclosure like a garage, attic, shed, or fully enclosed patio. I've seen people tempted to put a portable heater in a gazebo or a bathroom for "just a bit of warmth" – that's extremely dangerous. Without proper venting, carbon monoxide can build up quickly. Even a three-sided shed or a tent is a no-go because it essentially acts like a room. Always have at least three sides open to the outdoors, or plenty of cross-breeze, if your heater is under any roof. When in doubt, keep it outside-outside!
- Safe Distances from Combustibles: Mount the heater a safe distance away from anything flammable. Mount the heater a safe distance away from anything flammable. This includes wooden walls, fences, overhangs, or any materials that could catch fire or be damaged by heat. Manufacturers often specify a minimum clearance – for example, some gas water heaters require at least 30 cm of clearance above the unit, while others specify that no combustible materials should be placed within 13 cm of either side. This ensures the hot burner and exhaust won't scorch anything.
- Height and Exhaust Direction: Mount the water heater at a sensible height. You don't want the exhaust vent at ground level (where it might choke a crawling toddler or disturb your dog). Mounting it at shoulder or head height or higher is common, so the hot exhaust disperses above people. Also, point the exhaust vent/outlet away from areas where people gather. For wall-mounted units, the exhaust usually shoots out the front – so it should face open space, not directly at a patio table or toward a neighbour's open window. If your heater has a top vent, ensure there's nothing directly above it for a good distance (no low eaves or tree branches right overhead).
- Mind the Eaves and Overhangs: If installing under an awning or eave, be cautious. Hot moisture in exhaust can rise and condensate under a cold eave, causing drip stains or even wood damage over time. Try to position the heater so exhaust clears the eave, or use a vent cap that directs exhaust away. And of course, the eave itself is a structure – adhere to the clearance the manufacturer advises above the unit. Many heaters need several feet of clearance above for safety.
- Above Snow Level (if applicable): In snowy regions of Australia (yes, we do have some!), mount the heater and its vent termination above the expected snow linemanualzz.com. If the air inlet or exhaust outlet gets buried in snow, the heater will starve for air or push exhaust back at ground level. Also clear away leaf piles or debris for the same reason – keep those vents free.
- Stable and Secure Surface: Lastly, mount or place the heater on a secure, non-combustible surface. If it's wall-mounted, ensure the wall is solid enough (and non-flammable). For portable units, avoid placing them directly on grass or dirt – elevate it on a stand or hang it as instructed, so air can circulate all around.
By choosing a smart location, you set your water heater up for success: plenty of oxygen to breathe and a clear path to send out the hot air. Think of it like placing a BBQ – you wouldn't fire up a grill right next to a wall under a window, right? Same logic here. Now that you have the spot sorted, let's talk about setting up the airflow itself.
Setting Up Safe Airflow Paths
Okay, you've got the perfect spot for your heater. Now how do we channel the airflow properly? Ventilation is all about paths – one for air going in, and one for air going out. Let's break it down:
By minding both the intake and exhaust paths in your setup, you ensure your water heater can breathe easy. As one experienced RV user put it, you need two things: a way for fresh air to come in, and a way for exhaust to go out – neglect either one, and you'll have problemsskoolie.net. Now, let's look at some handy accessories that can further improve your ventilation game.
Using Ventilation Accessories
You might be surprised to know there are gadgets and add-ons specifically for improving the ventilation of outdoor water heaters. Depending on your setup and local conditions, some of these ventilation accessories can be real lifesavers (or at least shower-savers!). Here are some common ones and how to use them:
- Rain Caps (Rain Shields): A rain cap is a small hood or cover that goes on top of a vertical exhaust pipe. If your heater has a vent pipe going upward (say through a roof or out of a barrel sauna or something), a rain cap will prevent rainwater from pouring down the pipe. It also stops leaves or debris from falling in. Many are designed with a mesh or vents on the side so exhaust can flow out but rain can't go straight downgaslandchef.com. Even in horizontal exhaust setups, you can sometimes attach a hood over the outlet to keep rain out of the unit. Considering Australia's occasional heavy rains, this is a cheap accessory that protects your heater from water damage and blockages.
- Flue Pipe Extensions and Elbows: If you need to direct your exhaust to a specific safe location, you can use flue pipe sections (usually stainless steel tubes) to extend the exhaust. For example, you might run a short horizontal pipe to ensure exhaust clears a roof overhang, or add a 90° elbow plus a vertical pipe to vent fumes upward above head height. Camplux and other brands sell vent pipe kits for some models. Always secure these pipes tightly to the heater's exhaust outlet as instructed, so they don't rattle loose. Pro tip: If you add an elbow or long pipe, check your manual if the manufacturer limits pipe length or number of bends. Long or convoluted pipes can affect the flow, and you don't want to cause back-pressure on the burner. Keep it as straightforward as possible.
- Ventilation Ducting for Intake: Though less common, some setups use a flexible duct to bring fresh air from outside to the heater's intake (this is more for indoor installs or if you have a closed cabinet). If you have a mostly enclosed compartment for the heater, consider adding an air vent or louver to that compartment so fresh air can flow in. Accessories for this could be simple grills or vent covers. The key is a big enough opening and ideally two openings (low and high) to facilitate circulation.
- Wind Guards and Enclosures: In very windy areas (think coastal cliffs or open plains), protecting the flame from wind is important. Some manufacturers offer wind guards – these could be shields that attach around the burner or a specially designed wind-resistant casing for the unit. If your heater frequently blows out due to wind, look into these. Even a DIY partial enclosure (like a U-shaped screen around the sides and back of the heater) can cut down wind impact. Just never cover the front/top where exhaust comes out. I've seen folks use metal water heater boxes or old BBQ grill lids as makeshift shelters – creative, but always ensure exhaust can vent freely upward. Another trick is a vent deflector – a curved piece that attaches to the exhaust outlet to redirect exhaust in a certain direction (away from wind or people). Use these with care and test that exhaust is still dispersing properly.
- Carbon Monoxide Alarms: While not a ventilation device per se, having a portable carbon monoxide detector on hand is a smart safety accessory. If you're using an outdoor heater in a somewhat confined space (like an RV annex or near a tent opening), an alarm will warn you if CO levels get high. It's an extra layer of safety in case ventilation isn't as good as you thought.
Before using any accessory, ensure it's compatible with your heater model. Follow installation instructions – a poorly installed vent pipe or cap could leak or fall off. After installing, do a test run: watch the exhaust flow, and check if there are any signs of backdraft or if the flame is affected. Regularly inspect these add-ons too (they're now part of your vent system). For instance, a rain cap can get clogged with soot over time – give it a cleaning occasionally. If you use a flexible duct, make sure it hasn't come loose or become kinked.
Accessories can significantly improve safety and reliability, but they are not a substitute for proper placement and basic ventilation. Think of them as the icing on the cake – helpful, and sometimes essential, but you still need to bake the cake (i.e. set up in a good location with good airflow) first. With the right accessories in place, you'll be well-prepared for rain, wind, or whatever Mother Nature throws at your outdoor shower setup.
Maintenance and Periodic Inspections
Ventilation isn't a "set and forget" deal – you've got to give it a little TLC from time to time. The good news is, ventilation maintenance for an outdoor water heater is pretty straightforward and doesn't take long. Here's how to keep your system breathing easy for the long haul:
- Regular Vent Inspections: Make it a habit to inspect the venting system at least once a year (and before any big trip if it's a portable unit). Look at the exhaust outlet and any vent pipes for signs of damage or blockage. Check all around the heater – is there any soot buildup where it shouldn't be? Any cracks or holes in a vent pipe? Catching issues early can prevent safety hazards and performance problems.
- Ensure Joints and Seals Are Tight: If your unit has a flue pipe or any accessory attached, verify that the joints are still snug and sealed. Vibration or weather might loosen connections over time. A loose vent pipe could leak exhaust or even fall off. Most pipes use clamps or screws – give them a quick tighten if needed. Also ensure any gaskets or sealants the manufacturer provided are intact.
- Clear Out Blockages: This is super important. Remove any debris, insect nests, or dirt from both the intake and exhaust areas. You might gently vacuum or brush the vent screens. I often find spider webs in the air intake vents of my heater – spiders love tiny holes – so I clear those out regularly. If there's a screen or mesh, make sure it's not clogged with dust. Remember that even small obstructions can impede airflow significantly. Insect or critter nests are a notorious issue – some mud dauber wasps, for example, like to nest in gas appliance vents. If you see signs of that, clean it out and consider putting a fine mesh over openings (one that doesn't disrupt airflow).
- Check for rust or corrosion: Outdoor equipment faces the elements. Inspect metal vent components for rust, corrosion, or wear. A rusty flue pipe might eventually develop holes. If you spot rust, especially on crucial parts like the exhaust port or pipe, address it – you may need to replace that part. Stainless steel components usually last long, but cheaper metal might corrode in salty coastal air or humid environments.
- Seasonal Checks: Different seasons, different challenges. Before winter, ensure there's no water in any vent parts that could freeze. If you're in a frost-prone area, double-check that exhaust outlets won't be blocked by snow or ice. After autumn, clear out fallen leaves around the unit. In spring, look for any new insect activity or debris that might have accumulated during disuse. Also, after any big storm (dust storm, heavy rain, etc.), give the system a once-over. High winds can blow in debris or even dislodge vent pieces, so it's wise to check.
- Burner and Flame Check: Indirectly related to ventilation: inspect the burner flame when the unit is running. It should be blue and steady. If you see a flickering, yellow, or weak flame, that might indicate a ventilation issue (among other things). Turn off the unit and investigate – perhaps something is blocking the air intake or exhaust. Regular maintenance of the burner (cleaning it per manual instructions) will also ensure it burns clean and doesn't produce excess soot that could clog vents.
- Clean the Surroundings: Keep the area around the heater tidy. Don't let trash, tarps, or storage items crowd the heater. For example, never drape a towel or raincoat over the unit (someone did that at a campsite to dry it – nearly melted it and blocked all vents!). Give it breathing room.
- Professional Check-ups: If you're not comfortable, you can have a professional service person inspect the whole unit and venting. This might be overkill for a portable heater, but for a permanently installed one, a pro can ensure everything is up to code and in top shape. They can also test for proper draft if needed.
Consistent maintenance prevents little issues from becoming big dangers. Ventilation-related problems, like obstructions or leaks, can impair your heater's function or create safety risks. The effort here is minimal compared to the benefit of a reliably hot and safe shower. As one guide puts it, an intact and clear vent is vital for continuous safe operation – so don't neglect giving your vent system a periodic once-over. It's like cleaning the lint filter in your dryer – a small chore that goes a long way!
Common Ventilation Mistakes to Avoid
Even well-intentioned DIYers can slip up when it comes to ventilation. Let's save you the trouble by highlighting a few common mistakes people make (and should absolutely avoid):
- Using the Heater in an Enclosed Space: This one's worth repeating because it's the biggie. Never use an "outdoor" water heater in an enclosed or poorly ventilated space (garage, tent, van, shed, etc.)manuals.plus. Cracking a window or door is not enough – these heaters are not designed for indoor use and can quickly fill the space with carbon monoxide. Tragically, there have been cases of people getting CO poisoning by running camping heaters or water heaters in tents or vehicles. Don't risk it. Keep it outside in the open. If you need a water heater indoors, buy a properly rated indoor unit with a sealed vent system.
- Pointing the Exhaust Toward People or Windows: Be mindful of where that hot exhaust is going. Don't direct the exhaust vent toward areas where people congregate (like seating areas, doorways, open tent flaps). It sounds obvious, but I've seen a heater placed right next to a picnic table – everyone wondered why they got headaches. Similarly, don't have the exhaust blasting straight at a house window or the side of a caravan. Not only can fumes enter, but the heat can damage window frames or paint over time. Always aim exhaust away from living spaces.
- Insufficient Clearance Around the Unit: Some folks tuck the heater in a tight spot for convenience or aesthetics – e.g. mounting it right under a low eave or wedging it between a post and wall. This is a mistake. If the unit doesn't have enough breathing room, heat and exhaust can build up around it. Lack of clearance can also be a fire hazard if near combustibles. Follow the clearance rules – usually measured in tens of centimeters clearance on all sidesmanuals.plus – and err on the side of more space when possible. Also, avoid mounting under a deck or low roof without proper venting; heat rises and can warp wood or set off fire alarms above.
- Ignoring Maintenance: Ventilation issues often creep in slowly. If you never inspect or clean the vents, you might not notice a bird's nest in your exhaust or rust eating through a pipe until it's too late. Skipping maintenance is a common mistake. As we just discussed in the prior section, a quick check now and then can prevent a lot of trouble. Don't assume "it's outdoors, it'll take care of itself." Take care of it, and it will take care of you.
- Using the Wrong Vent Materials: Another blunder is DIYing a vent solution with whatever's at hand. For instance, using a plastic dryer vent hose to channel hot exhaust – that's a big no-no (it can melt or catch fire). Or using galvanized duct that isn't rated for high heat – it can corrode quickly. Stick to proper vent materials provided or recommended by the manufacturer. High-temp stainless steel flues, proper rain caps, etc., might cost a bit more than improvised fixes, but they won't fail on you when it counts.
- Vent Termination Mistakes: If you extended a vent pipe, be careful about how and where it terminates (ends). A mistake here is ending a vent pipe in a bad location – for example, right under an eve or too close to a wall, where the hot exhaust then gets trapped. Another is not using a vent cap on a vertical run – rain could come in, or wind could easily downdraft. Also, not sloping a horizontal vent slightly downward (away from the heater) can allow rain or condensate to flow back into the unit. Avoid these by following proper vent termination guidelines: usually a slight downward slope out, and a proper cap, and placement well away from any structure openings.
- Overestimating Ventilation of "Open" Areas: Sometimes people think "well, this shed/barn has gaps, so it's basically outdoors." That complacency can be dangerous. Even a big barn can accumulate carbon monoxide if the heater runs long enough and there's not active airflow. So don't assume a space is ventilated just because it's large or has some drafts. Either fully treat it as an indoor space needing vents/flue, or move the appliance completely outside.
- Running in High Winds Without Precautions: If you operate the heater in very windy conditions without any wind break, you might get flame-out situations or erratic performance. The mistake is ignoring wind impact – you might find the heater keeps tripping off and wonder why. The solution is as discussed: provide some wind shielding (but not enclosure) or relocate temporarily. Many outdoor units have safety cut-offs for high wind, so don't force it – protect it or wait till winds die down.
Avoiding these mistakes seems common and easy, but it does need extra attention because some products will not work well for you in certain circumstances. When in doubt, always ask: "Is this how the manufacturer intended the heater to be used?" If the answer is not, reconsider your setup. Ventilation issues aren't always obvious until something goes wrong (headaches, the heater stops working, etc.), so thinking ahead keeps you and your heater safe.
Conclusion
Properly ventilating your outdoor water heater comes down to three big priorities: safety, compliance, and maintenance. First and foremost is safety – keeping yourself and your family safe from dangers like carbon monoxide and fires by ensuring plenty of fresh air and a clear exhaust path at all times. Next is compliance (not in the boring legal sense, but simply following the rules and guidelines provided): always adhere to the manufacturer's installation instructions and clearance requirements. Those guidelines aren't just red tape – they're there to protect you and to ensure your heater operates as designed. Plus, sticking to them keeps your warranty intact and your insurance happy. Lastly, maintenance is key – regularly checking and cleaning your ventilation setup will catch any issues early and keep the hot water flowing smoothly for years to come.
Ventilating an outdoor water heater isn't hard, but it does require a bit of thought and care. Always give your heater room to breathe (fresh air in, exhaust out), use the right gear (vents, caps, etc.), and keep an eye on it over time. If you do that, you can enjoy those steaming hot showers under the open sky with full peace of mind.
So, is proper ventilation worth the effort? Too right, it is! It means safer, longer, and more comfortable hot showers wherever you set up – whether at a campsite by the beach or in your off-grid tiny home in the bush. Stay safe, stay warm, and happy outdoor showering, mates!